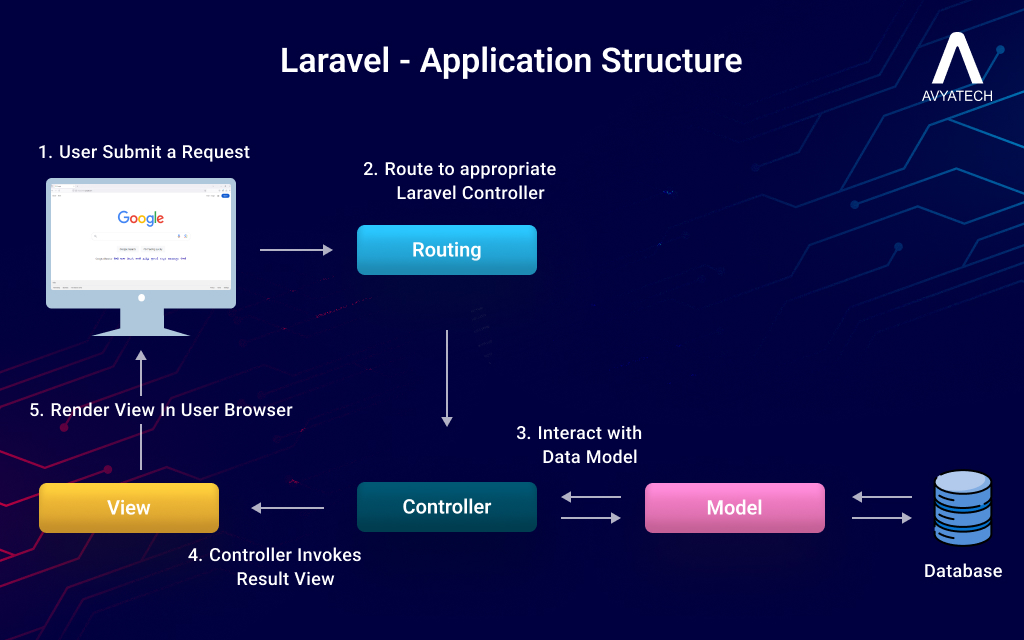
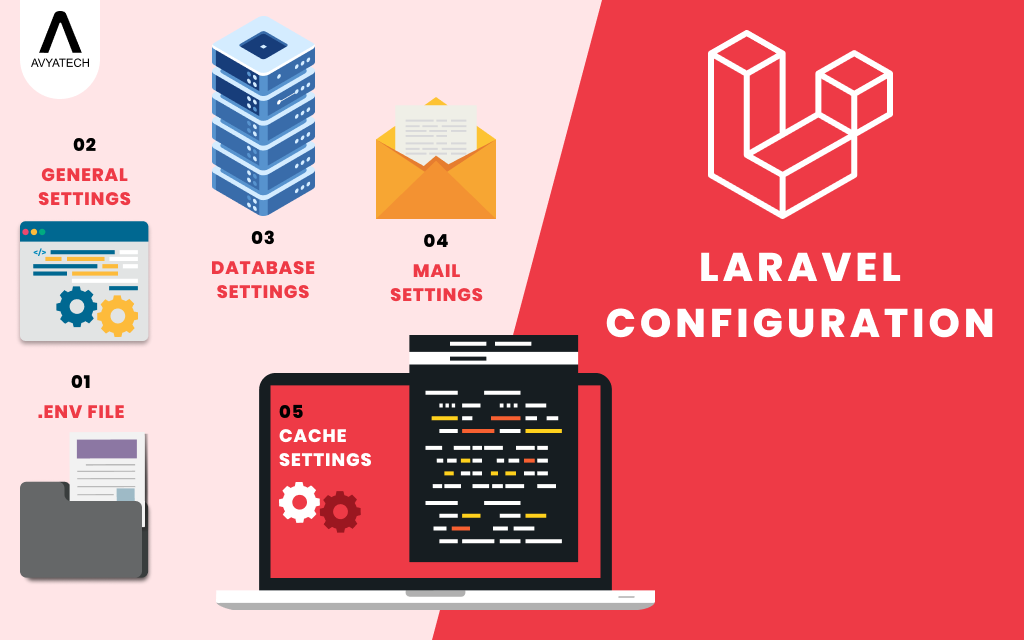
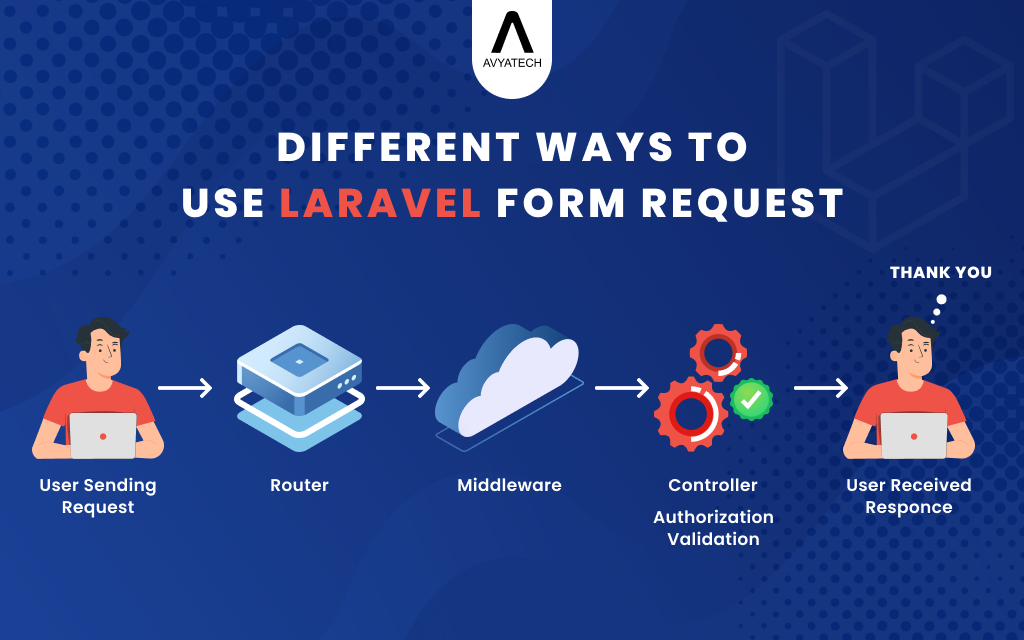
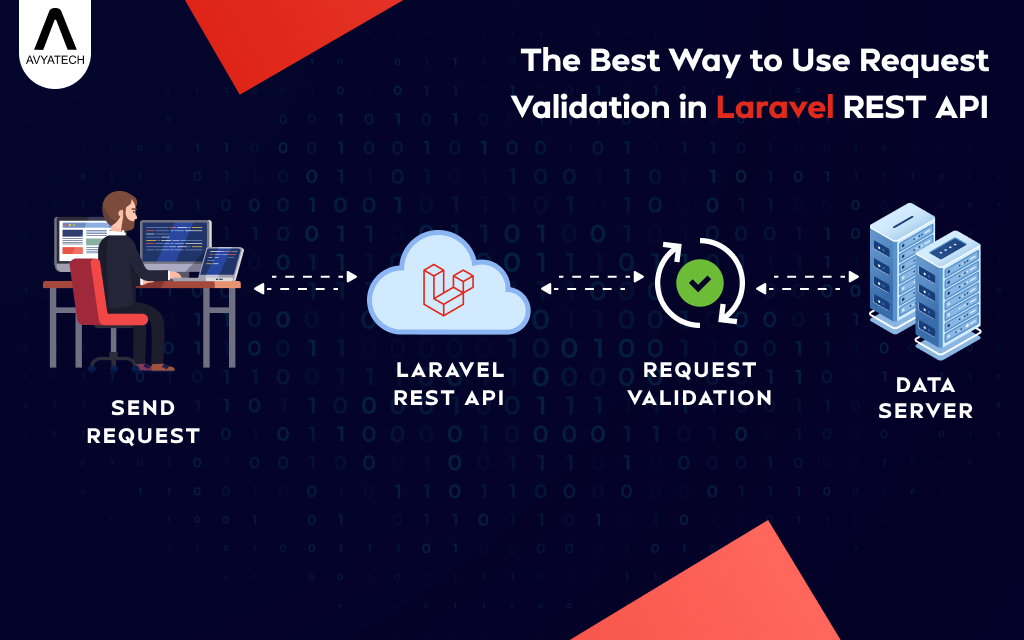
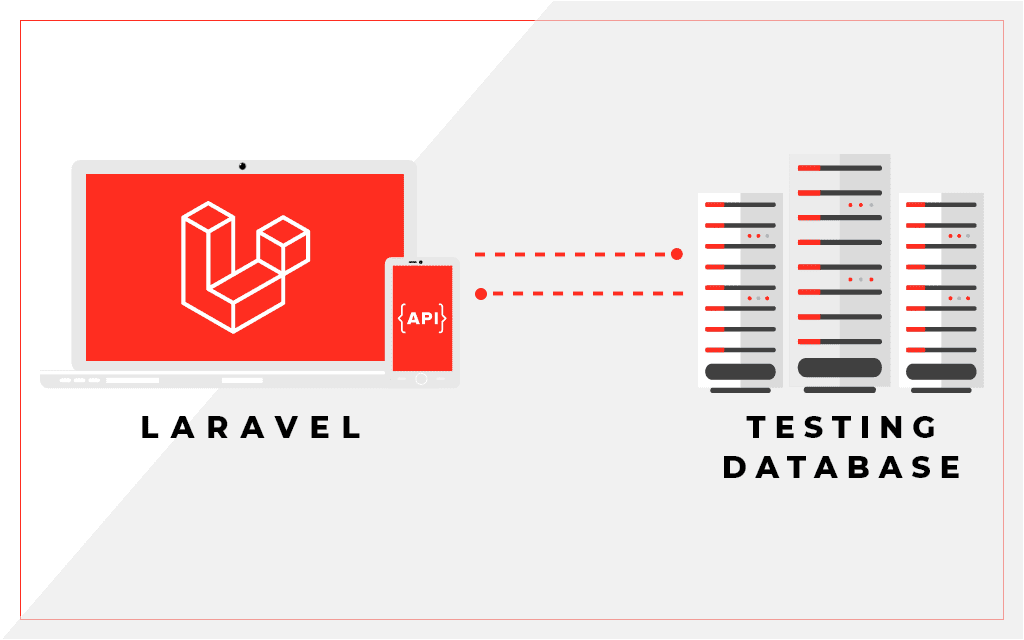
Laravel offers a selection of practical tools and assertions to make it simpler to test your database-driven apps. Laravel local testing can easily create test database entries by utilizing your application’s Eloquent models and relationships.
with Laravel model factories and seeders. All of these powerful features will be covered in the documentation that follows. Unit tests focus on a specific section of your code, allowing you to isolate and concentrate on that particular portion. A single procedure is the subject of most unit tests. As a result, tests in your “Unit” test directory cannot access your application’s database or other framework services because they do not boot your Laravel application.
The advantages of unit testing in Laravel, how to set it up for unit testing, how to write and execute unit tests in Laravel, and best practices for writing successful unit tests are all covered in this blog. This post will give you the skills and information you need to master unit testing in Laravel, whether you are a novice to the practice or an experienced developer.
Using a testing database in your Laravel unit tests is important for several reasons:
Isolation
Your tests are kept separate from your development or production databases thanks to the testing database. This means any modifications performed while running a test on the testing database will not impact your other databases.
Consistency
You can make sure that your tests are always run on a consistent set of data by utilizing a testing database. This aids in preventing unexpected test failures brought on by modifications to your production or development database.
Speed
You can speed up the testing database since it is only utilized to run tests. This can speed up the testing process and enable you to receive feedback on your modifications more quickly.
Repeatability
You can ensure that your tests are reproducible by using a testing database. This means that you can repeat your tests and get the same results each time, which can be helpful for debugging and troubleshooting.
Overall, using a testing database in your Laravel unit tests ensures that they are quick, accurate, and consistent. Making improvements to your database interactions also reduces the risk of introducing problems or mistakes in your application.
There are a few essential Laravel testing best practices to remember when writing unit tests in Laravel:
Only test one thing at a time: Each test should be limited to only one technique or feature.
Use descriptive name: Use descriptive test names for Laravel database testing that makes it apparent what the test is testing. Give your test names that have meaning.
Write tests first: By starting with tests, you can make your code more testable and avoid writing functionality that is challenging to test.
Test edge cases: To guarantee that your code functions correctly in all circumstances, test edge cases such as empty inputs or maximum input values.
These Laravel testing tips and best practices will help you set up your test database.
Instructions
Step 1
The first step is to create a database. This database should be a clone of your real database, which is used by the application but should not contain any data inside the tables. For example, we have given the name “unittest_db” to the new database.
Step 2
Create .env.testing in the root folder and paste the below codes
Now the database is separated for testing purposes and when you run unit tests your real database will not be tempered. Also, your application will use unittest_db during testing.
Below are some useful laravel commands to run the testing.
Run all tests in one shot:
php artisan test
Run single file test:
php artisan test --filter=ProductTest
Execute single method:
php artisan test --filter=ProductTest::test_store
Run all tests in one shot:
php artisan test
If you have installed XDebug on your local machine and want to generate awesome reports of your unit test just run the command:
php artisan test --coverage-html=reports
By following the above steps, you can set up a testing database for local testing in the database. If you are looking for expert developers to do it for you, contact us now. We are a reliable Laravel development company with a pool of talented developers.
What is ChatGPT?
Recently, OpenAI has developed an Artificial intelligence Chatbot called ChatGPT. It is based on the design of the “Generative Pre-trained Transformer 3.5” (GPT-3.5). Based on input, GPT-3.5 can comprehend and produce text that resembles a person’s. It uses deep learning techniques to evaluate and comprehend data patterns, allowing it to produce logical and pertinent responses to the situation. Here, we are going to discuss ChatGPT in Laravel and its use cases. Read on!
ChatGPT can answer your queries, give explanations, engage in conversation, and do several other natural language processing functions. It also assists with tasks that require language understanding and generation. To enable developers to incorporate ChatGPT into various programs and services and offer interactive and conversational experiences, OpenAI has made it available through an API. People are using it for content creation, virtual assistants, chatbots for customer service, and more. In this ChatGPT tutorial for Laravel, you will learn how to integrate it into your laravel project.
Applications of ChatGPT: A Quick Look
It would help if you kept in mind that the GPT model does not include a fully working product that covers all domain areas. Consequently, more models are a must for the GPT model to operate. You’ll also need the application for it as well as backend administration tools. Users can use the output of a GPT model to examine using NLP methods to extract pertinent information. The model replies with text that appears to be long sentences. You can use one or more words as filters or keywords in later pipeline stages as this output.
You may already be aware that OpenAI released ChatGPT after 2022. Everyone is aware of how effective ChatGPT is. Thankfully, as developers, you can use the official API to benefit from this capability. In today’s session, we’ll discover the process of ChatGPT integration with Laravel. Therefore, we won’t be creating a chat-based app this time. As you are aware, Chatgpt is currently available for everyone and you can integrate this amazing tool with your Laravel project to make your applications intelligent. Let’s learn How to integrate ChatGPT in Laravel 10.
Integrate ChatGPT api in Laravel 10
To use ChatGPT API in Laravel 10, you can follow these steps:
Install GuzzleHTTP package:
Guzzle is a PHP HTTP client that will help you make API requests. You can install it using Composer by running the following command in your Laravel project directory:
composer require guzzlehttp/guzzle
Create a Controller:
Create a new laravel controller that will handle the API requests to ChatGPT. For example, let’s create a ChatGPTController.php file:
php artisan make:controller ChatGPTController
Open the ChatGPTController.php and implement the following code:
<?php
namespace App\Http\Controllers;
use Illuminate\Http\Request;
use Illuminate\Support\Facades\Http;
use GuzzleHttp\Client;
class ChatGPTController extends Controller
{
protected $httpClient;
public function __construct()
{
$this->httpClient = new Client([
'base_uri' => 'https://api.openai.com/v1/',
'headers' => [
'Authorization' => 'Bearer ' . env('CHATGPT_API_KEY'),
'Content-Type' => 'application/json',
],
]);
}
public function askToChatGpt()
{
$message = "what is laravel";
$response = $this->httpClient->post('chat/completions', [
'json' => [
'model' => 'gpt-3.5-turbo',
'messages' => [
['role' => 'system', 'content' => 'You are'],
['role' => 'user', 'content' => $message],
],
],
]);
return json_decode($response->getBody(), true)['choices'][0]['message']['content'];
}
}
Register route:
Open the routes/web.php file and add a route to test the ChatGPT API:
Copy the key and paste it into the .env file CHATGPT_API_KEY=’YOUR_GENERATED_KEY’
Visit http://localhost:8000/chat in your web browser or use tools like Postman to make a GET request to the /chat endpoint. You should see the response from the ChatGPT API.
That’s it! You have now integrated ChatGPT API into your Laravel 10 application. We hope this ChatGPT guide for Laravel will help you with the integration. If you are looking for expert Laravel development services, we are here for you. Let’s connect to discuss more.
Along with CodeIgniter, Zend, and others, Laravel is presently one of the most powerful frameworks. Laravel adheres to the Symphony-based Model-View-Controller design. If you’re acquainted with ASP.NET Core MVC, Laravel is quite similar, but it’s built in PHP.
In this tutorial, we will see how to integrate FontAwesome and laravel 8 + admin lte using npm. Before we start our tutorial, let’s understand some of the terms we will be using in this tutorial.
What is AdminLTE3?
Admin LTE is a free, open-source template for an admin dashboard and control panel built on top of Bootstrap. AdminLTE has been developed over time and is now at version 3.1.0. Its simplicity and fluidity reduce development time when combined with HTML and Bootstrap. Many components are pre-made and ready to use.
What is Font Awesome 5?
Font Awesome is the 2nd most popular icon set that you can use to get scalable vector images and customize them with CSS. It offers more than 1,600 icons in the free set that you can use to find an icon to suit your needs. Font Awesome 5 is available in two editions: a PRO version with 7842 icons and a FREE version with 1588 icons.
How can I use a free copy of Font Awesome 5?
To use the Free Font Awesome 5 icons, either download the Font Awesome library or create an account at Font Awesome and get a code (called KIT CODE) to add Font Awesome to your web page. In this video, we will implement AdminLTE 3 with a fresh Laravel 8 project using the npm command. Also, we will use FontAwesome 5 for icons. No need to do it manually.
Let us start with the integration tutorial:
Step 1: Install fresh Laravel
laravel new laravel-adminlte
Go to project
cd laravel-adminlte
Step 2: Install laravel ui package
composer require laravel/ui
Step 3: Configure ui assets
php artisan ui vue
Step 4: You have to install npm
npm install
Step 5:
In this step, you have to integrate admin lte in laravel
Install admin-lte 3 in Laravel 8 using: https://adminlte.io/themes/dev/AdminLTE/index3.html
npm install admin-lte
Step 6:
In this step, you have to Install fontawesome
npm install --save @fortawesome/fontawesome-free
Step 7:
Import admin lte and fontawesome css in public/css/app.css using laravel-mixins
Open: resources\sass\app.scss and paste below code
Now the admin lte 3 and font awesome ready to use with laravel 8
Step 10:
Let’s create a route, open web.php, and paste below code
Route::get('admin', function () {
return view('admin');
});
Step 11:
Create a admin.blade.php file and past admin lte index.html code as shown in my video tutorial
Now run the below command and enjoy
npm run dev && npm run watch
Clear the Laravel cache
php artisan optimize
Start laravel serve
php artisan serve
Congratulations! You are all set!
When you first open the Laravel application in your web browser, you’ll see the login and Register buttons in the upper right corner of the screen. After successfully starting the program, you may browse the following URLs and begin experimenting with the UI.
There are other open-source programs accessible online with which you may feel more at ease, including:
Laravel-Administrative by Jeroennoten
AdminLTE 3’s official docs
MultiAuthority Bitfumes
The packages listed above are fantastic and make it simple to integrate AdminLTE with Laravel. It takes just a few minutes to configure them and have your application up and running.
Conclusion
Laravel and AdminLTE 3 are two new frameworks that you need to familiarize yourself with to complete the integration projects. If you are not able to integrate the two, contact us now. We are a popular Laravel web development company with hands-on experience in Laravel.
Role based authentication is an authorization mechanism for Laravel applications. In this Laravel role-based authentication tutorial, we will see how to perform role-based authorization in Laravel from scratch. This Laravel 8 role-based authentication example will create different admin panels for admin and super admin for role-based Laravel authorization.
In this role based authentication in Laravel, we will create middleware to control user access. Sometimes we need to create an admin panel by creating role based authentication or login systems in Laravel.
Before starting with role-based authenticationand authorization in Laravel, let’s understand what role-based authorization is and what we can achieve with this.
Let’s imagine we are building an application that a variety of customers will use. However, some parts of the application should only be accessible by customers having a certain privilege.
This is where a role-based authentication system comes into the picture. We have to create a few extra tables in your database to define all the roles in your application and map our users to certain roles.
Step-1: Create laravel project
First, create or download a fresh laravel project to create laravel authorization.
Step-2: Create middleware
Now, you have to create middleware to control user access by writing the following command:
php artisan make:middleware CheckRole
Step-3: Create Controllers
Let’s create two new controller’s AdminController and SuperAdminController.
//Index method for Admin Controller
public function index()
{
return view('admin.home');
}
//Index method for SuperAdmin Controller
public function index()
{
return view('superadmin.home');
}
The index method from AdminController returns the home page from the admin folder and the index method for SuperAdmin Controller returns the home page which is in the super admin view folder.
Step-4: Create Views
Create new folder admin under resources > views and add new file home.blade.php
@extends('layouts.app')
@section('content')
<div class="container">
<div class="row">
<div class="col-md-8 col-md-offset-2">
<div class="panel panel-default">
<div class="panel-heading">Admin Dashboard</div>
<div class="panel-body">
@if (session('status'))
<div class="alert alert-success">
{{ session('status') }}
</div>
@endif
This is Admin Dashboard. You must be privileged to be here !
</div>
</div>
</div>
</div>
</div>
@endsection
Next, create a new folder superadmin under resources > views and add a new file home.blade.php
@extends('layouts.app')
@section('content')
<div class="container">
<div class="row">
<div class="col-md-8 col-md-offset-2">
<div class="panel panel-default">
<div class="panel-heading">Super Admin Dashboard</div>
<div class="panel-body">
@if (session('status'))
<div class="alert alert-success">
{{ session('status') }}
</div>
@endif
This is the Admin Dashboard. You must be super privileged to be here !
</div>
</div>
</div>
</div>
</div>
@endsection
Step-5: Create the Role model and setup migration:
php artisan make: model Role -m
The above command will create a Model class for the roles table and will also create a migrations file under database > migrations Edit the CreateRolesTable class under the migrations folder
<?php
use Illuminate\Support\Facades\Schema;
use Illuminate\Database\Schema\Blueprint;
use Illuminate\Database\Migrations\Migration;
class CreateRolesTable extends Migration
{
/**
* Run the migrations.
*
* @return void
*/
public function up()
{
Schema::create('roles', function (Blueprint $table) {
$table->increments('id');
$table->string('name');
$table->string('description');
$table->timestamps();
});
}
/**
* Reverse the migrations.
*
* @return void
*/
public function down()
{
Schema::dropIfExists('roles');
}
}
Step-6: Create Migration for the role_user table:
We need another table, which holds the data of which role is assigned to which user.
php artisan make:migration create_role_user_table
Edit the CreateRoleUserTable class in the migrations folder:
<?php
use Illuminate\Support\Facades\Schema;
use Illuminate\Database\Schema\Blueprint;
use Illuminate\Database\Migrations\Migration;
class CreateRoleUserTable extends Migration
{
/**
* Run the migrations.
*
* @return void
*/
public function up()
{
Schema::create('role_user', function (Blueprint $table) {
$table->increments('id');
$table->integer('role_id')->unsigned();
$table->integer('user_id')->unsigned();
$table->timestamps();
});
}
/**
* Reverse the migrations.
*
* @return void
*/
public function down()
{
Schema::dropIfExists('role_user');
}
}
Next, we need to provide a many-to-many relationship between User and Role
Add roles() method to your User.php class
public function roles()
{
return $this
->belongsToMany('App\Role')
->withTimestamps();
}
Add users() to your Role.php class
public function users()
{
return $this
->belongsToMany('App\User')
->withTimestamps();
}
Step-7: Create tables and add data for testing:
You can now run the migrate command to create the tables in the database
php artisan migrate
Running the Migrate command creates the following tables in your database. You can choose to fill the data for testing either manually or via Seeding.
Migrations
Password_resets
Roles
Role_user
users
We have created two Roles with the name ROLE_ADMIN and ROLE_SUPERADMIN. Users assigned the role of ROLE_ADMIN should have access to the Admin Section of the Application. The same applies to super admin users.
Role Admin
Super Admin
You can register a new user’s by going into /register url, after you have added a few user’s you can assign roles to users in the role_user table.
I have assigned some sample roles to the user.
Just a few more steps, Don’t give up !
Step-8: Modify User.php:
Open user.php and add these tiny methods which will be used to check if the user has a particular role or roles.
public function authorizeRoles($roles)
{
if ($this->hasAnyRole($roles)) {
return true;
}
abort(401, 'This action is unauthorized.');
}
public function hasAnyRole($roles)
{
if (is_array($roles)) {
foreach ($roles as $role) {
if ($this->hasRole($role)) {
return true;
}
}
} else {
if ($this->hasRole($roles)) {
return true;
}
}
return false;
}
public function hasRole($role)
{
if ($this->roles()->where('name', $role)->first()) {
return true;
}
return false;
}
With the above methods, if you are looking to check just against a single role you can make use of the hasRole method. Or You can check against multiple roles by passing an array to authorizeRoles method. Currently, we are only looking to compare against a single role, We will make use of the hasRole method. Let’s go ahead and create the Middleware for the same.
Step-9: Create Middleware:
Now we will create a new middleware CheckRole.
php artisan make:middleware CheckRole
Modify the CheckRole.php file under app > Middleware
<?php
namespace App\Http\Middleware;
use Closure;
class CheckRole
{
/**
* Handle an incoming request.
*
* @param \Illuminate\Http\Request $request
* @param \Closure $next
* @return mixed
*/
public function handle($request, Closure $next, $role)
{
if (! $request->user()->hasRole($role)) {
abort(401, 'This action is unauthorized.');
}
return $next($request);
}
}
We have modified the handle method middleware to check for a given role. The next step is to register the middleware we just created. Open Kernal.php which is located under App > and modify array $routeMiddleware to include the role middleware.
Open AdminController.php. Below code in constructor method will check if the logged in user has role ROLE_ADMIN associated with it.
public function __construct()
{
$this->middleware('auth');
$this->middleware('role:ROLE_ADMIN');
}
Repeat the same steps for SuperAdminController.php.
public function __construct()
{
$this->middleware('auth');
$this->middleware('role:ROLE_SUPERADMIN');
}
That’s it! Only privileged users can access certain parts of your application. So far, it was too much coding and reading. Now, only privileged users can access that part of the applications. Meaning, you will have complete control over which users will have how much access on a Laravel-based application—looking for Laravel app development services? Need to upgrade the existing Laravel application? You can contact Avya Tech, a trusted Laravel web development company, for any help related to the Laravel application.
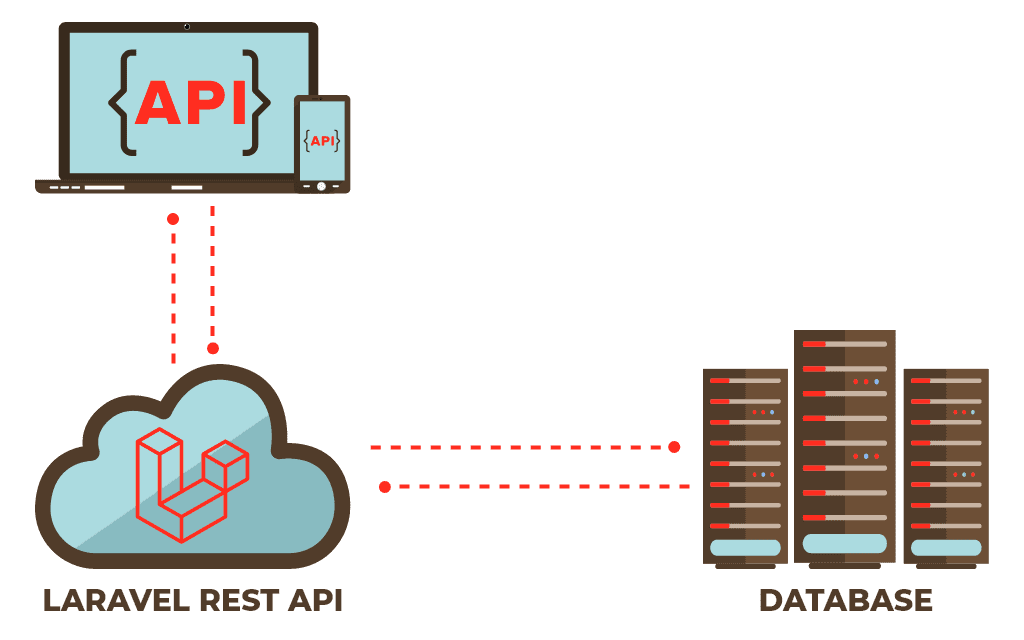
A RESTful API is an application programming interface that adjusts to REST engineering style’s limitations and considers cooperation with RESTful web services. REST represents an illustrative state move and was made by scientist “Roy Fielding.” This Laravel test-driven development tutorial will help you build a rest API with Laravel in the least time and effort.
Before starting our Laravel TDD tutorial, let’s understand what REST API is and its types.
What is REST API?
A REpresentational State Transfer API is an architectural style or set of concepts for an application program interface (API). REST API utilizes HTTP solicitations to access information that can be used to GET, PUT, POST, and DELETE information types, which alludes to the perusing, refreshing, making, and erasing activities concerning resources.
The key advantage of REST is that they offer a lot of flexibility and allow you to do more with this particular API. In this blog, we use Laravel REST API with Test-Driven Development without opening Postman or a browser.
Four main resource methods associated with REST API are:
GET: A GET resource method requests the server to find the requested information and send it to you.
POST: A POST allows the server to create a new entry in the database.
PUT: A PUT request allows the server to update an entry in the database.
DELETE: A DELETE request allows the server to DELETE an entry in the database.
The Anatomy Of A Request
It’s important to know that a request is made up of four things:
Endpoint URL
Method
Headers
Body or data
Endpoint URL: Endpoint is the URL you request for.
Method: The method is the type of request you send to the server. You can choose from these five types below based on the action you want the server to do.
GET
POST
PATCH
PUT
DELETE
Headers: The REST headers and parameters contain a wealth of information that can help you track down issues when you encounter them. HTTP Headers are an important part of the API request and response as they represent the meta-data associated with the API request and response.
Body of data: The request body is used to send and receive data via the REST API. If we are using POST/PUT API, then we should send the whole resource information based on the REST API contract because these methods work on the whole resource.
What is a passport?
Laravel Passport provides a full OAuth2 server implementation for your Laravel application in a matter of minutes. Passport is built on top of the League OAuth2 server maintained by Andy Millington and Simon Hamp. In the Laravel framework, there is a built-in Login form. To develop API authentication and for authenticating a User in API, we need tokens. In general, API needs a token for accessing the user or authenticating a user. The Laravel framework comes with a Laravel passport package, which provides the full OAuth2 server implementation.
What does the OAuth2 server do?
OAuth2 serves to protect API with an access token or allows clients to request a new access token and refresh them.
Here are some grants supported by the OAuth2 server:
Authorization code grant
Implicit grant
Client credential grant
Resource Owner password credential grant
Refresh grant
Index
Install Laravel 8
Install Passport Library
Login API
Logout API
Create Product API
Update Product API
List Product API
Find Product API
Delete Product API
Server Requirements
PHP >= 7.2.0
BCMath PHP Extension
Ctype PHP Extension
Fileinfo PHP extension
JSON PHP Extension
Mbstring PHP Extension
OpenSSL PHP Extension
PDO PHP Extension
Tokenizer PHP Extension
XML PHP Extension
Follow the below steps to develop a restful API.
Step 1. Install Laravel
Now you have enough knowledge to get started with test-driven Laravel development. Next, we will start creating secure Laravel APIs. let’s create a fresh Laravel project by running the below command using terminal:
Passport’s service provider registers its own database migration directory, so you must migrate your database after installing the package. The Passport migrations will create the below table in your database. Where laravel will store OAuth2 clients and access tokens:
Passport tables:
oauth_access_tokens
oauth_auth_codes
oauth_clients
oauth_personal_access_clients
oauth_refresh_tokens
Step 4: Generate the keys using.
php artisan passport:install
This command will create the encryption keys needed to generate secure access tokens in the above database.
Step 5 Register passport in service provider
Open the config/app.php file and update the provider array.
Add passport trait into app/Models/User.php, which ships with many helper method passport methods to authenticate the user’s token and scopes.
// app/Models/User.php
<?php
namespace App;
...
use Laravel\Passport\HasApiTokens; // include this
class User extends Authenticatable
{
use HasFactory, Notifiable, HasApiTokens;
...
}
Steps 7: Call passport route
To register the routes to issue and revoke access tokens (personal and client), you will have to call the Passport::routes method within the boot method of AuthServiceProvider.
Open the app/Providers/AuthServiceProvider file and update its content as shown below:
<?php
namespace App\Providers;
use Illuminate\Foundation\Support\Providers\AuthServiceProvider as ServiceProvider;
use Illuminate\Support\Facades\Gate;
use Laravel\Passport\Passport; // add this
class AuthServiceProvider extends ServiceProvider
{
/**
* The policy mappings for the application.
*
* @var array
*/
protected $policies = [
'App\Models\Model' => 'App\Policies\ModelPolicy', // uncomment this line
];
/**
* Register any authentication / authorization services.
*
* @return void
*/
public function boot()
{
$this->registerPolicies();
Passport::routes(); // Add this
}
}
After registering Passport::routes(), Laravel Passport is almost ready to handle all authentication and authorization processes within your application.
Step 8. Update api driver
For your application to be ready to use Passport’s TokenGuard to authenticate any incoming API requests, open the config/auth configuration file and set the driver option of the API authentication guard to passport:
],
'api' => [
'driver' => 'passport', // set this to passport
'provider' => 'users',
'hash' => false,
],
],
...
];
The installation process is done, now we will learn how to set up API routes register, login, and CRUD operation.
Create Controller
Step 9 Authentication controller
In this step, we will use the artisan command to generate an Authentication Controller for the application. This controller will process and handle requests for registration and login for a user into the application.
We will create an authentication controller which will process and handle the requests for registration and login for a user into the application.
php artisan make:controller API/AuthController
This will create a new API folder within app/Http/Controllers and then create a new file named AuthController.php. Open the newly created controller file and update the code given below:
<?php
namespace App\Http\Controllers\API;
use App\Http\Controllers\Controller;
use App\Models\User;
use Illuminate\Http\Request;
use Validator;
use Hash;
class AuthController extends Controller
{
public function register(Request $request)
{
$validator = Validator::make($request->all(), [
'name' => 'required|max:55',
'email' => 'required|email|unique:users',
'password' => 'required|min:6'
]);
if($validator->fails()){
return response(['error' => $validator->errors()]);
}
$user = User::create([
'name' => $request->name,
'email' => $request->email,
'password' => Hash::make($request->password)
]);
$accessToken = $user->createToken('authToken')->accessToken;
return response([ 'user' => $user, 'access_token' => $accessToken]);
}
public function login(Request $request)
{
$data = $request->all();
$validator = Validator::make($data, [
'email' => 'required|email',
'password' => 'required|min:6'
]);
if($validator->fails()){
return response(['error' => $validator->errors()]);
}
if (!auth()->attempt($data)) {
return response(['message' => 'Login credentials are invaild']);
}
$accessToken = auth()->user()->createToken('authToken')->accessToken;
return response(['access_token' => $accessToken]);
}
}
Step 10: Create Laravel test model and migration for product
php artisan make:model Product -m
In this step, we will create a Laravel test model. The above command will create the model App/Models/Product.php and migration file database\migrations\2021_07_18_113413_create_products_table.php
Update Model App/Models/Product.php
<?php
namespace App\Models;
use Illuminate\Database\Eloquent\Factories\HasFactory;
use Illuminate\Database\Eloquent\Model;
class Product extends Model
{
use HasFactory;
protected $fillable = ['name', 'sku', 'upc'];
}
Now update the migration file: database\migrations\2021_07_18_113413_create_products_table.php
<?php
use Illuminate\Database\Migrations\Migration;
use Illuminate\Database\Schema\Blueprint;
use Illuminate\Support\Facades\Schema;
class CreateProductsTable extends Migration
{
/**
* Run the migrations.
*
* @return void
*/
public function up()
{
Schema::create('products', function (Blueprint $table) {
$table->id();
$table->string('name');
$table->string('sku');
$table->string('upc');
$table->timestamps();
});
}
/**
* Reverse the migrations.
*
* @return void
*/
public function down()
{
Schema::dropIfExists('products');
}
}
Now run the migration to migrate products table
php artisan migrate
This will create a table named “products” in the database.
The command above will generate an API resource controller that does not include the create and edit view since we are only building APIs
Open app/Http/Controllers/API/ProductController.php and update the code is given below:
<?php
namespace App\Http\Controllers\API;
use App\Http\Controllers\Controller;
use App\Models\Product;
use Illuminate\Http\Request;
use App\Http\Resources\ProductResource;
use Validator;
class ProductController extends Controller
{
/**
* Display a listing of the resource.
*
* @return \Illuminate\Http\Response
*/
public function index()
{
$products = Product::all();
return response(['products' => ProductResource::collection($products)]);
}
/**
* Store a newly created resource in storage.
*
* @param \Illuminate\Http\Request $request
* @return \Illuminate\Http\Response
*/
public function store(Request $request)
{
$data = $request->all();
$validator = Validator::make($data, [
'name' => 'required|max:255',
'sku' => 'required|max:255',
'upc' => 'required|max:255',
]);
if($validator->fails()){
return response(['error' => $validator->errors(), 'Validation Error']);
}
$product = Product::create($data);
return response(['product' => new ProductResource($product), 'message' => 'Product created successfully']);
}
/**
* Display the specified resource.
*
* @param \App\Models\Product $product
* @return \Illuminate\Http\Response
*/
public function show(Product $product)
{
return response(['product' => new ProductResource($product)]);
}
/**
* Update the specified resource in storage.
*
* @param \Illuminate\Http\Request $request
* @param \App\Models\Product $product
* @return \Illuminate\Http\Response
*/
public function update(Request $request, Product $product)
{
$data = $request->all();
$validator = Validator::make($data, [
'name' => 'required|max:255',
'sku' => 'required|max:255',
'upc' => 'required|max:255',
]);
if($validator->fails()){
return response(['error' => $validator->errors(), 'Validation Error']);
}
$product->update($data);
return response(['product' => new ProductResource($product), 'message' => 'Product updated successfully']);
}
/**
* Remove the specified resource from storage.
*
* @param \App\Models\Product $product
* @return \Illuminate\Http\Response
*/
public function destroy(Product $product)
{
$product->delete();
return response(['message' => 'Product deleted successfully']);
}
}
Step 12: Create a Resource
Laravel Eloquent resources allow you to convert your models and collections into JSON format. It works as a data transformation layer between the database and the controllers. This helps provide a uniform interface that can be used wherever you need it within your application. Let’s create one for the Product model by using the following command:
php artisan make:resource ProductResource
This will create a new resource file named ProductResource.php within the app/Http/Resources directory. Open this file and update the below code:
<?php
namespace App\Http\Resources;
use Illuminate\Http\Resources\Json\JsonResource;
class ProductResource extends JsonResource
{
/**
* Transform the resource into an array.
*
* @param \Illuminate\Http\Request $request
* @return array
*/
public function toArray($request)
{
return parent::toArray($request);
}
}
Step 13: Update Routes File
To complete the set up of the endpoints for the methods created within our controllers, update the routes.api.php file with the following contents:
<?php
use Illuminate\Http\Request;
use Illuminate\Support\Facades\Route;
use App\Http\Controllers\API\AuthController;
use App\Http\Controllers\API\ProductController;
/*
|--------------------------------------------------------------------------
| API Routes
|--------------------------------------------------------------------------
|
| Here is where you can register API routes for your application. These
| routes are loaded by the RouteServiceProvider within a group which
| is assigned the "API" middleware group. Enjoy building your API!
|
*/
Route::middleware('auth:api')->get('/user', function (Request $request) {
return $request->user();
});
Route::post('/register', [AuthController::class, 'register']);
Route::post('/login', [AuthController::class, 'login']);
Route::apiResource('/product', ProductController::class)->middleware('auth:api');
Run the following command to view the configured routes and their details.
php artisan route:list
Run the Application
php artisan serve
Step 14: Testing on postman
Now we have created the restful API using passport, next you should open the postman and perform the below action
Register
Login
Add product
Update Product
Find Product
Delete Product
Get All Products
Register User
Method: POST
Login and get an access token
Method: POST
Add product:
Method: POST
Update Product:
Method: PUT
Find Product
Method: GET
Get All Product:
Method: GET
Delete Product
Method: DELETE
Now let’s move on to Test-Driven Development (TDD). It means testing what we have just written.
As once said by James Groening, one of the pioneers of TDD and Agile development methodology:
“If you are not doing development through testing, then later you will do development through debugging”
James Groening
What is PHPUnit:
PHPUnit is one of the oldest and most well-known unit testing packages for PHP. It is primarily designed for unit testing, which means testing your code in the smallest components possible. Still, it is also incredibly flexible and can be used for a lot more than just unit testing. PHPUnit includes many simple and flexible assertions that allow you to easily test your code, which works really well when you are testing specific components.
PHPUnit with Laravel:
Laravel is built with testing in mind. In fact, support for Laravel functional testing with PHPUnit is included out of the box, and a phpunit.xml file is already set up for your application. The framework also ships with convenient helper methods that allow you to test your applications expressively.
Step 15: Generate test classes for AuthTest and update
php artisan make: test AuthTest
The above command will create a file under the tests/Feature directory; open this file update command below.
<?php
namespace Tests\Feature;
use Illuminate\Foundation\Testing\RefreshDatabase;
use Illuminate\Foundation\Testing\WithFaker;
use Tests\TestCase;
use App\Models\User;
class AuthTest extends TestCase
{
public function testRegister()
{
$response = $this->json('POST', '/api/register', [
'name' => $name = 'Test',
'email' => $email = time().'test@example.com',
'password' => $password = '123456789',
]);
//Write the response in laravel.log
\Log::info(1, [$response->getContent()]);
$response->assertStatus(200);
// Receive our token
$this->assertArrayHasKey('access_token',$response->json());
}
public function testLogin()
{
// Creating Users
User::create([
'name' => 'Test',
'email'=> $email = time().'@example.com',
'password' => $password = bcrypt('123456789')
]);
// Simulated landing
$response = $this->json('POST',route('login'),[
'email' => $email,
'password' => $password,
]);
//Write the response in laravel.log
\Log::info(1, [$response->getContent()]);
// Determine whether the login is successful and receive token
$response->assertStatus(200);
//$this->assertArrayHasKey('token',$response->json());
// Delete users
User::where('email','test@gmail.com')->delete();
}
}
Congratulations! You are done with REST API integration in Laravel. Although the development method seems longer than the usual debugging process after writing code, it is suitable for the early detection of errors. As an early user of the context-driven, agile Laravel web application development process, AvyaTech is a leading Laravel web development companywith a decade-long experience. Our Laravel development team has hands-on experience in creating Laravel applications that are intuitive and highly functional.
Reasons Why You Should Select Laravel for eCommerce Website Development
Laravel is an all-in-one e-commerce platform that includes tools and features that enable users to easily conceptualize, imagine, develop, design, run, operate, and manage an e-commerce platform. Around 459,818 live websites are developed using Laravel technology worldwide. Users who want to launch an utterly legitimate Laravel eCommerce website that is stable and safe at all endpoints would greatly benefit from all Laravel tools and features.
Why Laravel for eCommerce website development?
Since Laravel tools are incredibly scalable, all sizes can find that all functions will fit seamlessly to unique, specific, and specialized needs. Laravel comes with a user-friendly vendor dashboard with single-page checkout, cross-selling, coupons, discounts, delivery options, and safe digital payment gateways.
Suffice it to say, online retailers have taken off, and in a big way! One of the essential factors in running such a company is the foundation for building a digital store. Even though the market has many options, here are some of the reasons why most organizations choose Laravel eCommerce website development:
1. Access to in-built packages and OOP libraries
The 20+ pre-installed libraries in Laravel deserve special mention. They get built using object-oriented programming concepts. The libraries make it easier to create cool features for e-commerce websites.
Laravel, but every PHP framework provides various ready-made packages that developers can use to create the ideal Laravel eCommerce website development. These packages also have many features, including high scalability, support for omnichannel, and self-determination.
These kits also assist with security management, changing the workflow template to meet your needs, and creating a website to meet your unique needs. These packages are available for free. As a result, you only need to pay for the services provided by a Laravel web development company, and you can access these features for free.
Laravel includes over twenty pre-installed OOP (object-oriented programming) libraries to speed up the process of developing exceptional features for an eCommerce shop.
2. Secure architecture
Maintaining the protection of an eCommerce store is one of the most difficult challenges that companies face. Due to the store’s multiple payment gateways, storage of sensitive customer data, and other factors, high-level protection gets needed. Laravel provides specialized security tools to protect against coding-related threats such as XSS and SQL injections. Furthermore, it enables developers to create encrypted passwords using the Bcrypt hashing algorithm.
Securing confidential user information is as important as other business model aspects for eCommerceplatforms. Attacks on IT infrastructure can result in the “leakage” of sensitive information; therefore, security experts recommend a complete backup of your website.
It is also advised to stop using a shared server and to install web application firewalls. Filtering and validating all data, using solid credentials, and assigning authorization and authentication to users are all standard practices.
Laravel’s architecture, which gets used to create robust e-commerce websites, places a premium on security. Its robust security features protect against anomalies, which is essential given that the average cost of a DDoS attack to an enterprise can be $40,000 per hour.
Its automated system combines risks, controls, and usability based on the needs of the company. It inserts “guards” that serve the function of authenticating users for each request they make, while “providers” help to retrieve users from the database.
Following that, Laravel’s built-in system compares the request to the one saved in the user’s session. If the request does not fit, it gets marked as invalid, and it will take no further action.
3. Flexible development cycles
Using the Laravel platform provides developers with unrivaled flexibility in designing completely new e-commerce websites with no constraints. Your excellent online store deserves a fantastic website!
You will get your online store up and running quickly. Laravel eCommerce website development cycles are effective because of:
The newest features of OOP
MVC architecture
easily understandable and well-organized documentation
object-relational mapper Eloquent CRM
command-line tool Artisan
templating engine Blade
library manager Composer
pre-installed OOP libraries
The system includes numerous efficient development cycles that enable your customers to obtain fast services from your store. Laravel includes advanced OOP features, simple-to-handle and understand documentation, eloquent CRM for object-related mapping, a built-in templating engine blade, and a command-line tool artisan.
4. Easy to use
Laravel provides easy-to-use content management, allowing you to add blog posts, catalog products, and more without the assistance of a developer. Besides that, Laravel has many built-in plugins and themes that reduce development time and expense.
The system employs a tailored problem-solving strategy to ensure the smooth and error-free production of your online store.
5. Easy migration
Building a new eCommerce store with Laravel or migrating from another platform to Laravel is painless and straightforward. It is done flawlessly by a developer or a seasoned Laravel web development company. Furthermore, the system enables you to start small and scale up later.
It means you can expand your Laravel eCommerce store with additional outstanding features at any point in the future. Developers can easily and rapidly increase the capacity of the website by using its horizontal scalability.
6. Provide a seamless communication medium
Businesses must consider several factors to ensure the success of their eCommerce website development. Some of these include keeping in mind the desire of their targeted customers, brand coverage, an influential presence on social media sites, and user-friendly and business-oriented architecture.
Another critical aspect we cannot overlook is providing consumers with seamless and safe communication channels. Laravel, as a dynamic system, gives them all. As a result, it gets rightfully regarded as the best option for Laravel eCommerce website development.
7. High-performance stores
It must perform competently to provide an unrivaled experience to its users if it is an online store or another website. Laravel delivers excellent performance thanks to its excellent support for cache backends such as Memcached and Redis.
Furthermore, the system provides developers with additional caching configuration options. Moreover, it enables developers to take advantage of other efficiency and speed optimization strategies, such as memory use reduction and database indexing.
8. Budget-friendly
Laravel is self-sufficient, which means it does not rely on third-party resources and apps to provide different features. It enables the creation and deployment of web applications with zero downtime, lowering project development costs.
Laravel’s vast and customized deployments to various servers combine to make it one of the most acclaimed platforms for creating a web application. It saves a lot of money on development.
9. Easy testing and maintenance
Performing unit testing and debugging is simple with Laravel to ensure the flawlessness of your eStore. Using the framework’s PHPUnit, developers can quickly validate the code and database. It saves a significant amount of time. Laravel not only allows for easy checking, but it also allows for easy maintenance. The system employs a Model View Controller (MVC) architecture, which aids in separating logic and presentation.
Furthermore, the framework’s OOP concepts make it easier for the project creation team to manage the website.
If you’ve chosen Laravel for the eCommerce store, look for a reputable Laravel web development company to meet your requirements. Another alternative is establishing an offshore development center and having your project built remotely by a dedicated team.
Whatever choice you select, make sure you conduct comprehensive research to ensure you end up with Laravel Development Company which provides high-quality services at a reasonable price.
10. Scalable
Laravel can create a full-fledged eCommerce platform as well as a quick and professional B2B site. It can build and support a range of advanced features for your site, such as password reset and encryption, due to its comprehensive pre-installed authorization libraries. Many third-party packages are available to provide the website with various functionality and functionalities, such as Socialite, which allows users to sign in using their social media accounts if you choose to add that option.
11. SEO-friendly CMS
You need to create your eCommerce website on a platform that is SEO-friendly. Laravel helps you generate SEO-friendly URLs. You will have an SEO-friendly framework that will help search engines quickly access and index your Laravel website. If your website gets indexed, the search engine can display your content to relevant users, bringing traffic to your web application or website.
Nowadays, most web application development and web design creation provide an SEO-friendly framework, and developing one for your company is a critical move.
12. Integration with third-party tools
Almost every website needs integration with a third-party framework of some kind. It may be a payment system like Stripe or Paypal or a marketing tool used by your company. Whatever the integration, Laravel’s clean APIs for integration make integrating third-party apps easy. So, whether your page needs a payment system or an automated marketing platform, Laravel is a strong contender.
13. Great for Traffic-Handling
The amount of traffic to your website will increase as your company expands. A Laravel-built website can handle website requests much faster than most other frameworks. Laravel employs a one-of-a-kind message queue system, which allows you to postpone website activities, such as sending emails, until a later date.
Controlling time-consuming tasks enables the website to process tasks more quickly. It not only keeps your website’s server safe, but it can also lower your long-term hosting costs.
14. Proactive Lead Conversion
Laravel eCommerce makes it easy for consumers to integrate SEO activities into their e-commerce platform. All laravel ecommerce users will target local and global markets with advanced SEO tools that assist website owners in studying consumer needs and desires.
15. Easy Store Management
All Laravel users have access to a dynamic dashboard that allows for easy tracking of product releases, purchases, discounts, deals, and even feedback. Since the software is cloud-based and accessible 24 hours a day, monitoring can get done anytime and anywhere.
Conclusion
Laravel is one of the most capable frameworks for developing eCommerce stores due to its benefits such as high-level protection, ease of maintenance, efficient development cycles, scalability, and others mentioned in this article. It assists companies in growing and succeeding in the online market.
Typically, business owners underestimate the significance of a solid web application needed for a successful eCommerce website. They enter a highly competitive market with just half the tools necessary to succeed. As a result, their tenure is brief.
In this tutorial, we will learn how to Build REST API with Laravel 8 using JWT Token (JSON Web Token) from scratch.I’m sure after this topic you will be able to create a Rest API.
In this tutorial, we will create a login, register, and full crud operation with jwt authentication. But before starting with the API you should know about the rest API and jwt token.
What is Rest API?
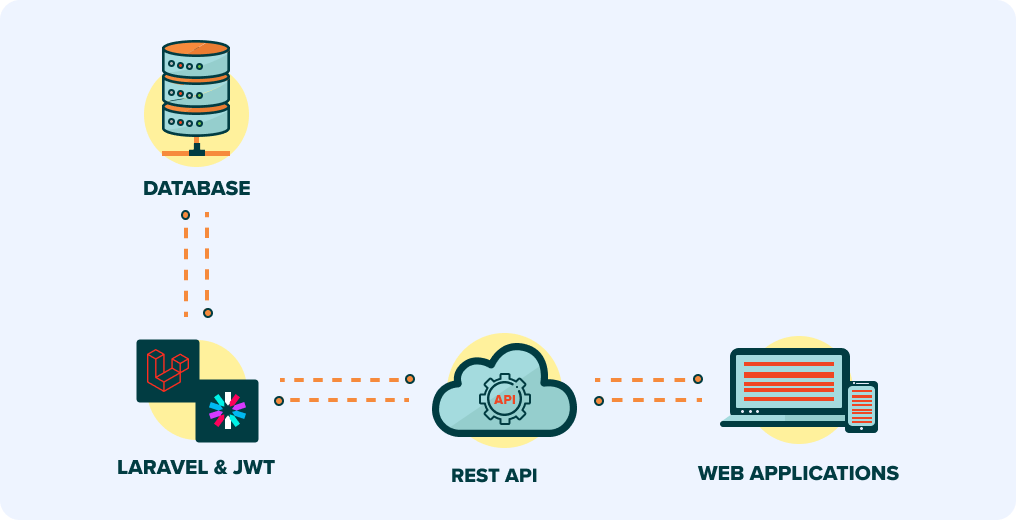
The REST API (also known as the RESTful API) is an application programming interface (API or web API) that follows the specifications of the REST architecture style and enables interaction with RESTful web services. REST stands for Representative State Transition and was developed by the computer scientist Roy Fielding.
REST is a set of architectural limits, not a protocol or a standard. Developers of APIs can enforce REST in several ways.
When a client request is made through the RESTful API, a description of the resource status is passed to the requester or the endpoint. This information is given in one of several formats through HTTP: HTML, JSON (Javascript Object Notation), XLT, PHP, Python, or plain text. JSON is the most common programming language to use since, unlike its name, it is both agnostic-language and readable by both humans and machines.
Although the term was invented more than 15 years ago, it was not until recently that the REST API became one of the most commonly adopted, to the point of being considered a fashion choice. The reality is that this software architecture has many benefits over other alternatives. Here are the main features of the REST APIs that demonstrate (with examples) why its popularity is far more than a passing trend:
It is stateless
One of the key features of the REST API is that its service is stateless, which means that any time we refer to it, it would be important to remind it of our details, whether it is our user credentials or any other records. What, on the one hand, may seem to be a disadvantage–implying the tiresome role of repeating data–is one of its strengths: because it does not memorize them, it allows for greater scalability. There will be no need for those efficient servers that are capable of holding all the states of their clients.
It supports JSON and XML
There are developers for all preferences, and the API should try to cater to all of them. Another benefit of the REST API is that it satisfies the needs of those who use the JSON language as well as satisfies those who depend on XML.
If giants like Microsoft, Google, or WordPress prefer this type of software architecture in many of their tools, that is, among other reasons, because it stops them from avoiding any developer. They all have a place in the universe of the REST API.
It is simple than SOAP
Beyond the REST architecture, developers use the traditional SOAP, another option when writing an API. The key benefit of the former over the latter is that it is much easier to enforce. A good example can be seen in the API catalog that Salesforce provides: it has resources for both architectures, but states that REST requires access to services that are “efficient, convenient and simpler to communicate with Salesforce.”
Documentation
Each improvement in the architecture of the REST API should be mirrored in its documentation such that any developer who uses it knows what to expect. This is already another benefit over other specifications, which, while they can be mildly clarified – as is the case with the PayPal SOAP API – do not generally have much clarity.
Error messages
When you make a mistake while dealing with an API, any developer may appreciate the error. The possibility provided by the REST architecture of including error messages offering some hint in this regard is therefore also important. Returning to Microsoft, the resources provided by the organization founded by Bill Gates by Azure–its cloud tool–have a simple list of potential error messages that must have been helpful on more than one occasion.
What is a JWT token?
Json Web Token or (JWT) is a URL-safe method or a JSON Payload for securely transferring information from one party to another in the form of Json object. is a method to encode claims in a JSON document and becoming a famous way of handling auth. Brands like qfl-stack, Biting Bit, My Franchise, Mister Spex, Backend, and Tipe are currently using JWT token in their tech stacks.
JWT comes in two forms – Serialized and Deserialized. The Serialized approach is used to transfer the data via the network with every request and response and the deserialized approach is to read and write data to the web token. Now you have the understating of JWT token, let’s move to the structure part of JWT token.
The Structure of JWT
JWT is composed of 5 separate parts encoded in Base64.
Deserialized
Header
Payload
Serialized
Signature
Deserialized
JWT only contains the header and payload in the deserialized form. All these objects are basic JSON.
HEADER
The header in the JWT is often used to define the cryptographic operations applied to the JWT, such as the signature/decryption technique used on the JWT. It will also provide details about the media/content type of the information that we are transmitting. This data is interpreted as a JSON object while the JSON object is BASE64URL encoded. The encryption operations in the header signify whether the JWT is unsigned/signed or encrypted. The header usually consists of two parts: JWT and a hashing algorithm, for example, RSA or HMAC SHA256, type of token is used.
{ "alg": "HS256", "typ": "JWT" }
PAYLOAD
The second component of the token is the payload containing the arguments. Claims are statements about an entity, guy. The payload is the component of the JWT where all user data is stored. In reality, he added. These data are often referred to as the ‘claims’ of the JWT.
Information is readable by everyone, so it is often recommended not to include such information. Confidential material in this section. Generally, this segment includes user knowledge. This knowledge is present as a JSON object while this JSON object is encoded.
To the BASEL64URL. We can make as many assertions as we want inside a payload,
However, unlike the header, no statements are mandatory for a payload.
Registered claims: these are a series of predefined claims that are not mandatory but recommended for the purpose of offering a set of useful, interoperable claims.
Public claims: those using JWTs may be specified at will. But they should be specified in order to prevent collisions.
Private claims: they are custom claims created to exchange details between people that choose to use them and are neither documented nor public claims.
Serialized
In the serialized type, JWT represents a string of the following format:
[header].[payload].[signature]
In the serialized type, JWT represents a string of the following format:
[header].[payload].[signature]
All three of these elements are a serialized JWT. We all know what the header and payload are and what they’re used to.
SIGNATURE
This is the third component of the JWT that is used to confirm the validity of the token. The encoded header and payloads of BASE64URL are bound to the dot (.) and have been hacked using the algorithm for the Secret Key. This signature is applied to the header and payload with a dot (.) forming our real header.payload.signature.
Why do we use API in Laravel?
APIs use tokens to validate users and do not maintain session state between the requests. API authentication using Laravel is very easy using Laravel JW as it provides a full OAuth2 implementation of the server.
Index
Install laravel 8
Install JWT Library
Login API
Logout API
Create Product API
Update Product API
List Product API
Find Product API
Delete Product API
Server Requirements
PHP >= 7.2.0
BCMath PHP Extension
Ctype PHP Extension
Fileinfo PHP extension
JSON PHP Extension
Mbstring PHP Extension
OpenSSL PHP Extension
PDO PHP Extension
Tokenizer PHP Extension
XML PHP Extension
Step 1. Install laravel
Now you have enough knowledge to get started. Next we will start creating secure Laravel APIs. let’s create a fresh laravel project by run below command using terminal:
Install third party jwt-auth package. You can execute the following command to do so:
composer require tymon/jwt-auth
This command will install the jwt-auth package in the laravel vendor folder and will update composer.json. It is known as a third-party JWT package that supports user authentication using JSON Web Token in Laravel & Lumen securely.
Step 3. Add jwt package into a service provider
Open config/app.php file and update the providers and aliases array.
Then you will see a new file in config/jwt.php In the next step, you need to run a php artisan jwt:secret from the console to generate a secret auth secret.
You can use this key to sign your JWT tokens. However, the method of signing tokens will depend and vary on the algorithm that you choose to use.
Step 6. Create jwt middleware
Before we start defining our API routes, we have to create a JWT middleware. It will protect our route. You can use JWT middleware to verify the requests from API routes
This middleware will verify that the user is authenticated by checking the token sent in the request’s header and It will create a new middleware file in your Middleware directory. . In case of user not authenticated middleware throw UnauthorizedHttpException exception.
We have installed and configured the jwt token successfully. Now I’m going to show you how you can use this to parse the data between two applications.
Step 7. Configure database
Go to the root directory of your laravel installation restful authentication api with jwt tutorial project. And open the .env file and add the database details as follow:
Next, we have to CREATE API controller action. For that, open file app\Http\Controllers\ApiController.php and paste the below code.
<?php
namespace App\Http\Controllers;
use JWTAuth;
use App\Models\User;
use Illuminate\Http\Request;
use Tymon\JWTAuth\Exceptions\JWTException;
use Symfony\Component\HttpFoundation\Response;
use Illuminate\Support\Facades\Validator;
class ApiController extends Controller
{
public function register(Request $request)
{
//Validate data
$data = $request->only('name', 'email', 'password');
$validator = Validator::make($data, [
'name' => 'required|string',
'email' => 'required|email|unique:users',
'password' => 'required|string|min:6|max:50'
]);
//Send failed response if request is not valid
if ($validator->fails()) {
return response()->json(['error' => $validator->messages()], 200);
}
//Request is valid, create new user
$user = User::create([
'name' => $request->name,
'email' => $request->email,
'password' => bcrypt($request->password)
]);
//User created, return success response
return response()->json([
'success' => true,
'message' => 'User created successfully',
'data' => $user
], Response::HTTP_OK);
}
public function authenticate(Request $request)
{
$credentials = $request->only('email', 'password');
//valid credential
$validator = Validator::make($credentials, [
'email' => 'required|email',
'password' => 'required|string|min:6|max:50'
]);
//Send failed response if request is not valid
if ($validator->fails()) {
return response()->json(['error' => $validator->messages()], 200);
}
//Request is validated
//Crean token
try {
if (! $token = JWTAuth::attempt($credentials)) {
return response()->json([
'success' => false,
'message' => 'Login credentials are invalid.',
], 400);
}
} catch (JWTException $e) {
return $credentials;
return response()->json([
'success' => false,
'message' => 'Could not create token.',
], 500);
}
//Token created, return with success response and jwt token
return response()->json([
'success' => true,
'token' => $token,
]);
}
public function logout(Request $request)
{
//valid credential
$validator = Validator::make($request->only('token'), [
'token' => 'required'
]);
//Send failed response if request is not valid
if ($validator->fails()) {
return response()->json(['error' => $validator->messages()], 200);
}
//Request is validated, do logout
try {
JWTAuth::invalidate($request->token);
return response()->json([
'success' => true,
'message' => 'User has been logged out'
]);
} catch (JWTException $exception) {
return response()->json([
'success' => false,
'message' => 'Sorry, user cannot be logged out'
], Response::HTTP_INTERNAL_SERVER_ERROR);
}
}
public function get_user(Request $request)
{
$this->validate($request, [
'token' => 'required'
]);
$user = JWTAuth::authenticate($request->token);
return response()->json(['user' => $user]);
}
}
Step 12. Prepare product controller action
Now, in this step, you will have to implement our authentication logic into our application. To create a product controller action, open file app\Http\Controllers\ProductController.php and paste below code:
<?php
namespace App\Http\Controllers;
use App\Models\Product;
use Illuminate\Http\Request;
use JWTAuth;
use Tymon\JWTAuth\Exceptions\JWTException;
use Symfony\Component\HttpFoundation\Response;
use Illuminate\Support\Facades\Validator;
class ProductController extends Controller
{
protected $user;
public function __construct()
{
$this->user = JWTAuth::parseToken()->authenticate();
}
/**
* Display a listing of the resource.
*
* @return \Illuminate\Http\Response
*/
public function index()
{
return $this->user
->products()
->get();
}
/**
* Show the form for creating a new resource.
*
* @return \Illuminate\Http\Response
*/
public function create()
{
//
}
/**
* Store a newly created resource in storage.
*
* @param \Illuminate\Http\Request $request
* @return \Illuminate\Http\Response
*/
public function store(Request $request)
{
//Validate data
$data = $request->only('name', 'sku', 'price', 'quantity');
$validator = Validator::make($data, [
'name' => 'required|string',
'sku' => 'required',
'price' => 'required',
'quantity' => 'required'
]);
//Send failed response if request is not valid
if ($validator->fails()) {
return response()->json(['error' => $validator->messages()], 200);
}
//Request is valid, create new product
$product = $this->user->products()->create([
'name' => $request->name,
'sku' => $request->sku,
'price' => $request->price,
'quantity' => $request->quantity
]);
//Product created, return success response
return response()->json([
'success' => true,
'message' => 'Product created successfully',
'data' => $product
], Response::HTTP_OK);
}
/**
* Display the specified resource.
*
* @param \App\Models\Product $product
* @return \Illuminate\Http\Response
*/
public function show($id)
{
$product = $this->user->products()->find($id);
if (!$product) {
return response()->json([
'success' => false,
'message' => 'Sorry, product not found.'
], 400);
}
return $product;
}
/**
* Show the form for editing the specified resource.
*
* @param \App\Models\Product $product
* @return \Illuminate\Http\Response
*/
public function edit(Product $product)
{
//
}
/**
* Update the specified resource in storage.
*
* @param \Illuminate\Http\Request $request
* @param \App\Models\Product $product
* @return \Illuminate\Http\Response
*/
public function update(Request $request, Product $product)
{
//Validate data
$data = $request->only('name', 'sku', 'price', 'quantity');
$validator = Validator::make($data, [
'name' => 'required|string',
'sku' => 'required',
'price' => 'required',
'quantity' => 'required'
]);
//Send failed response if request is not valid
if ($validator->fails()) {
return response()->json(['error' => $validator->messages()], 200);
}
//Request is valid, update product
$product = $product->update([
'name' => $request->name,
'sku' => $request->sku,
'price' => $request->price,
'quantity' => $request->quantity
]);
//Product updated, return success response
return response()->json([
'success' => true,
'message' => 'Product updated successfully',
'data' => $product
], Response::HTTP_OK);
}
/**
* Remove the specified resource from storage.
*
* @param \App\Models\Product $product
* @return \Illuminate\Http\Response
*/
public function destroy(Product $product)
{
$product->delete();
return response()->json([
'success' => true,
'message' => 'Product deleted successfully'
], Response::HTTP_OK);
}
}
Step 13. Update User.php model
Now that we have created the product controller action, let’s define this in our project model. This step will help you make managing and working with relationships easy, and supports a number of relationship types.Open file app\Models\User.php and paste below code:
<?php
namespace App\Models;
use Illuminate\Contracts\Auth\MustVerifyEmail;
use Illuminate\Database\Eloquent\Factories\HasFactory;
use Illuminate\Foundation\Auth\User as Authenticatable;
use Illuminate\Notifications\Notifiable;
use Tymon\JWTAuth\Contracts\JWTSubject;
class User extends Authenticatable implements JWTSubject
{
use HasFactory, Notifiable;
/**
* The attributes that are mass assignable.
*
* @var array
*/
protected $fillable = [
'name', 'email', 'password',
];
/**
* The attributes that should be hidden for arrays.
*
* @var array
*/
protected $hidden = [
'password', 'remember_token',
];
/**
* The attributes that should be cast to native types.
*
* @var array
*/
protected $casts = [
'email_verified_at' => 'datetime',
];
public function getJWTIdentifier()
{
return $this->getKey();
}
public function getJWTCustomClaims()
{
return [];
}
public function products()
{
return $this->hasMany(Product::class);
}
}
Step 14. Update Product.php model
Open file app\Models\Product.php and paste below code
<?php
namespace App\Models;
use Illuminate\Database\Eloquent\Factories\HasFactory;
use Illuminate\Database\Eloquent\Model;
class Product extends Model
{
use HasFactory;
protected $fillable = [
'name', 'sku', 'price', 'quantity'
];
}
Step 15. Create migration
Although Laravel comes with an in-built user model, migration, and factory files, it does not consist of a user seeder class. So in this step, we will create migration by running the command:
Open file database\migrations\2020_09_17_112923_create_products_table.php and paste below code
<?php
use Illuminate\Database\Migrations\Migration;
use Illuminate\Database\Schema\Blueprint;
use Illuminate\Support\Facades\Schema;
class CreateProductsTable extends Migration
{
/**
* Run the migrations.
*
* @return void
*/
public function up()
{
Schema::create('products', function (Blueprint $table) {
$table->id();
$table->unsignedInteger('user_id');
$table->string('name');
$table->string('sku');
$table->integer('price');
$table->integer('quantity');
$table->timestamps();
$table->foreign('user_id')
->references('id')
->on('users')
->onDelete('cascade');
});
}
/**
* Reverse the migrations.
*
* @return void
*/
public function down()
{
Schema::dropIfExists('products');
}
}
Step 16: Migrate database
Command:
php artisan migrate
By running this command table will be created in the desired database which is configured in the .env
And your table looks like this.
Step 17. Now start the development server
Command:
php artisan migrate
Test API
Note: In this tutorial, we have created a restful API in Laravel 8 using the jwt token. Now I’m going to show you how to test this API in postman.
Hope this tutorial is helpful for you to learn to Build REST API with Laravel 8 using JWT Token (JSON Web Token) from scratch.
When it is about developing SAAS (Software as a Service), developers need to overcome plenty of challenges; especially in the context of working on the ecosystem and architecture of the product. The way out for most developers is to choose a framework that is powerful and robust. This decision is going to be a key determinant of how well the final product will be performance-wise or feature-wise. Laravel and SaaS is one of the most popular choices of the developer community because of several reasons. One of them primarily being that with Laravel, the performance of the software at the backend is extremely powerful and steady; exactly right for a software product that is going to be used by a large number of users.
Laravel is the best PHP framework that supports MVC Architecture and is perfect for large scale applications. Know more why Laravel and SaaS are a perfect match.
What is SAAS?
This is a kind of IT environment where the software program is delivered directly to the users because it is a cloud-based system. Today, almost all types of businesses – whether, small, medium, or big use some of the other kinds of cloud-based software.
The software can be accessed by the users through the web browser or a specially designed native application. In this kind of ecosystem, the user is not required to download any app or program as the software can be accessed online directly.
What is Laravel?
Laravel is an open-source software framework, popularly called the PHP web framework because PHP is used as the technical language to write the codes. PHP is commonly used for the development of web-based applications. There are numerous advantages of using Laravel – it has a model-view-controller architecture, modular packaging, and is a cost-effective framework. The platform is also known to be extremely failsafe and secure, supporting the excellent performance of the apps from the backend. Also, developers can work with the framework in a seamless and fast manner; and can successfully overcome the issue of web authentication.
Before we go deep into the topic, it is essential to understand that SAAS is a framework that is meant for use by multiple users.
Developing SAAS apps is not an easy task – it involves complex steps and methods. The benefit of using Laravel is that it has some of the features that make the work of the developer easier and better.
The Laravel framework has been designed and developed in a way that delivers the software as a service application in a simplified and straightforward manner. Also, since Laravel is a robust platform it can easily support the application that gets accessed by multiple users simultaneously.
Laravel is an MVC framework
When developers work with Laravel, they can develop specific modules of the software easily because of the Model-view-controller (MVC) architecture. These modules can have numerous features, or they may be only focused on a single feature, Laravel enables developers to develop with ease where each developed module can seamlessly connect with the main app.
Let us take an example of Laravel and SAAS plug-in to see how. If you have an online store and you wish to declare a seasonal discount – for this, you can simply create a discount module that can be synced with your store anytime. The model remains synced as long as the discount scheme is open. Once, you need to close the discount scheme; you simply need to disable the plug-in.
The Laravel SAAS platform can be easily integrated with third-party software programs
It is quite common for developers to want to integrate the developed platform with a third-party tool like payment gateways, analytical tools, etc. These tools help in enhancing the working of the SAAS platform. In this context, it is easy to connect the Laravel SAAS app with such external tools. This is primarily because with Laravel, it is easy to manage the complicated processes associated with development related to API management.
The Laravel framework can be customized effectively
When the development involves a huge amount of work with a big team involved in the work, the application architecture can be quite complex. There are code maintenance issues that can be very daunting for the development and testing teams.
With Laravel, a lot of these issues can be tackled with ease developers can effectually customize their SAAS product without even giving any thought to the backend coding.
This is because the MVC framework of Laravel acts as the perfect base for their work. The framework has different models, views, and controllers. So, the team at the web development company can work with each of these separate components individually without thinking about the distribution and connection aspects.
The fact that Laravel offers a great platform for customization also leads to optimizing resources. It is important to mention here that Laravel has several features like the route and internal caching systems, JIT compiler, CDN, autoload optimization, and so on that can be optimized. The developers simply need to optimize these features by writing custom codes, and that is it. They do not have to develop anything from scratch, which is a big benefit for the development team.
Dashboards
The dashboard is the epicenter of the SAAS design and development work. The team of the Laravel web development company can access all information from a single dashboard. Laravel SAAS platforms are great because of the presence of the in-built dashboard.
SAAS is an innovative method for users to access and use software products on the internet. Laravel offers the most optimized technology and a stable framework for the development of SAAS applications. To take full advantage of the Laravel SAAS combination, it is essential to speak to an experienced web development company in India like AvyaTech that has competency in Laravel and SaaS.
Website security is a critical issue and irrespective of the costs involved, vigilance and pre-emptive efforts need to be a necessary part of your organizational strategy. At the pace technology is racing ahead, online attackers and spammers also gear themselves to find newer ways to attack your website. An online site can be a victim of several website vulnerabilities like SQL injections, cross-site scripting, insecure direct object references, and many more. Thankfully, if your website is on the Laravel PHP framework, you can make use of the Laravel security features to make your site and network failsafe.
Small businesses are as vulnerable as big and medium-scale businesses to cyber-attacks. Almost 43% of cyber attack victims are small businesses.
In 2020, the average cost of a data breach is going to be more than $150 million.
By 2021, the global spend on cybersecurity is expected to touch $6 trillion.
Cybersecurity, as we see it, is a sensitive topic and needs to be handled with care. Whether you are a small business or a big multinational company, ensure that you hire the services of a leading website development company in India like AvyaTech for your Laravel website.
Best Laravel Security Features Checklist (2023)
While the Laravel backend platform is secure and quite highly rated for security features in the developers’ community, you cannot assume that your site is 100% secure just because it is on Laravel.
Learn the best tips to improve your Laravel web application with the Laravel security best practices 2021. Follow these tried and tested tips to protect your website from cyber-attacks.
Choose a secure server host for your website
This is quite basic but many business owners and site admins go wrong here. Choose wisely between a shared and dedicated server. You need to have a website backup in place. You also need to ensure that the host is compliant with security protocols like FTPS, SSH, SSL, and VPNs.
Ensure that you are using the latest and updated version of PHP and Laravel
It goes without saying that it is always best to use the latest version of a platform because regular updates from the developers are done to make the system and the platform more robust and failsafe.
Have the firewall setting thoroughly assessed on a regular basis
To achieve optimized security for your site or app, ensure that all required firewalls are in place. There are different options to choose from – hence, it is highly recommended that you take the help of a professional Laravel development company to decide the best ones for your site.
Laravel security features need to be used optimally
Laravel offers a number of in-built security features – for example, the Authentication system from Laravel. The Laravel system uses two authentication techniques to authenticate user information – guards are used to authenticate the user data for every user request, while providers work in retrieving user information from the database. Developers who provide Laravel development services are required to pay attention to building up the database and the models; as well as define the controllers – the rest is for the system to take care of. The built-in authentication features will automatically start to get synched with the site or the app.
Protecting from SQL injection
SQL injection is a common form of unsuspected attacks on sites and apps. These happen due to user information that is stored in cookies, and the way the SQL queries are likely to be changed by others. Use PDO parameter binding to prevent others from trying to change the SQL queries.
Protecting from Cross-Site Request Forgery (CSRF)
For each and every active user on your Laravel site or app, the system generates a CSRF token. The use of tokens is done to prevent external parties from creating fake requests. Every time a request is generated, the platform compares the request with that saved in the saved token. If the request does not match with the saved token, the request is treated as invalid and the process does not get executed.
Protection from XSS or Cross-site Scripting
In the XSS attacks, the hackers hack the JavaScript of your site and the app so that each time a visitor comes to the affected page; the malicious script gets executed with damaging effects. Thus, it is essential to have XSS protection in place. Thankfully, the Laravel platform has in-built native Laravel security features to protect your site and app from XSS attacks. The system starts on its own and is the best way to protect your database.
Maintain a backup of the website
While all kinds of pre-emptive steps need to be taken to safeguard your site, business owners should take the backup of the site on a regular basis. Every day, your website admin should schedule some hours for a backup so that your site is always maintained in its freshest form. In case of any emergency, you will always have the option to come back to the backup site.
HTTP is not secure; use HTTPS instead
When HTTP is deployed on your site, all forms of exchanges happen in textual format. This includes sensitive information like personal data and even passwords. It is easy to steal textual content. Thus, use HTTPS deployment to make your site strong and secure. SSL certification and shifting from the HTTP and HTTPS format need to be set up by a reliable Laravel development company.
Use Laravel Purifier
One of the best Laravel security best practices is to use the HTML Purifier in enhancing the security of the system. Again, since this is technical, involve a developer with knowledge of the work.
It is quite evident that there are certain aspects that the website owners can take care of but there are certain aspects that only a specialized Laravel website development company can get done. This is because technical expertise in the platform is required to get the job done. Ensure that you have the best team available at AvyaTech offering dynamic and vibrant Laravel development services for making your site and app foolproof.
Today, almost 50% of websites online have been created using PHP web programming language. But not many are happy with the mediocrity of most of the PHP frameworks, especially when there are better choices available to the developer community. Laravel Web development framework is one that is fast gaining prominence and popularity because of its elegant and comprehensive syntax that uses Model-view-controller architecture to develop web applications.
The fact that it has a flawless simple syntax that can be used for making high-performing web applications indicates that the future of Laravel in 2023 and the coming years is quite promising. With this framework, developers can come up with the best creative solutions because the platform is used to make applications that are secure, adaptable, and scalable. If you are looking at getting a complex web application developed at cost-effective prices, you certainly need to look for a company like AvyaTech which is a leading Laravel custom web application development company in the country today.
What is Laravel?
Laravel is a PHP framework that is preferred by most professional web developers because of its simple features, guaranteed superior performance, flexibility to create projects of varying sizes with equal speed and agility, and the platform is extremely scalable.
Why is the Laravel application development service so extremely popular?
PHP Developers love Laravel application development services which are why there is no doubt that the love for Laravel will only show a positive trend this year. Laravel has a proven stronghold in the market today. It is in the leading position today amongst all web application frameworks available and it is going to get stronger from here on. The future of Laravel in 2023 and ahead is uninhabited and augmented growth.
Before we answer this, it is important to understand what a framework is. Just like buildings have a structure or a framework, similarly, making a web application requires a structure. This structure facilitates the creation of a software app or a website. A good framework is one that allows the developers to work on their core expertise with flexibility. So, such a sound framework will be characterized by cleaner coding, a simpler platform, one that offers easy testing and debugging functions, has a consistent and strict set of guidelines as well as is futuristic, which means that as your business grows, the application should also be able to meet the growing demand and usage.
There are certain exclusive features of the Laravel application development service which is why it is so popular in the developer community. These are:
Inversion of Control or IoC is one of the strongest and most practical features of the Laravel framework. This, in turn, rates the platform high on dependency management.
Laravel is a PHP framework that is made up of a collection of modules. The presence of such modules facilitates making complex and larger applications seamless.
Creating an authentication feature of the application using Laravel is smooth because of the in-built feature in the framework where the command simply needs to be run to activate it and create a full-fledged authentication module.
Caching is an important asset for web applications. Cached data helps retrieve user-related data fast. With the Laravel application development service, developers can make an application that intrinsically caches all the data from view routes.
Routing in Laravel is another feature that facilitates the creation of websites that are search-engine friendly.
Local searches have become so very crucial these days. The Laravel framework helps in the creation of multi-lingual applications with ease.
Envoy system that helps admin to run the regular tasks and functionalities on the cloud from the application itself.
Laravel offers an in-built migration system that is used by developers to create tables, indices, and databases.
With the Artisan feature, it is possible to run repetitive tasks on Laravel.
Laravel enables developers to create highly secured websites and applications.
The framework provides support for files in the local as well as the cloud system.
The Eloquent ORM supports the documentation of all database engines.
Using the framework, it is possible for developers to create complex database queries with ease and smoothly.
This framework also offers multiple helper functions such that developers can format complex data and layouts.
The framework also has a couple of debugging modules that provides almost full testing facilities to developers.
Why the future of Laravel in 2023 and ahead is bright?
These are the reasons why Laravel is in demand and the prospects of the platform look extremely positive-
Simplicity and conciseness – are the biggest strengths of the platform. Comparatively, other PHP infrastructures are dependent on complex coding. The simplicity of Laravel is embedded in the MVC architecture.
A robust authentication process and a superior caching system make Laravel far superior to all other competing web application development platforms.
One of the foremost reasons why the future of Laravel in 2023 is noteworthy is that it offers the creation of multilingual websites that help reach the mass market and multiple markets in one go.
Starting from uncomplicatedness and effortlessness, this is one framework that removes redundancy and repetitiveness and gives the developer a flexible platform to bring their intuitive and creative structure to give their best to app development.
What makes the future of Laravel in 2023 and ahead extremely positive is that the platform is high on versatility where any kind of business idea can be turned into an advanced high-tech web application with ease and flexibility. Thus, the chances that the output is going to be great are always there.
While scalability is a big feature of this platform. One strong feature that takes Laravel notches higher than all other PHP frameworks is the speed at which a feature-rich solution can be developed and offered to the client, that is built to meet the specific business requirement. This, in turn, offers their users a thoroughly enhanced experience – a feature that is so vital to creating a distinctive edge for the business of the client.
Technology is expensive and the advanced form is costly. Small-time entrepreneurs and medium-scale businesses really cannot afford to spend on this scale. Laravel is, therefore, the solution of the future because it is cost-effective.
Laravel is one of the most versatile coding structures that can be used for IoT developments. Advanced PHP 7 allows developers to use asynchronous programming where a single script can fulfill different types of functions and tasks. Therefore, it is important to hire the services of a top Laravel web development company that will be able to work on the specific requirement of your business and build optimized solutions.