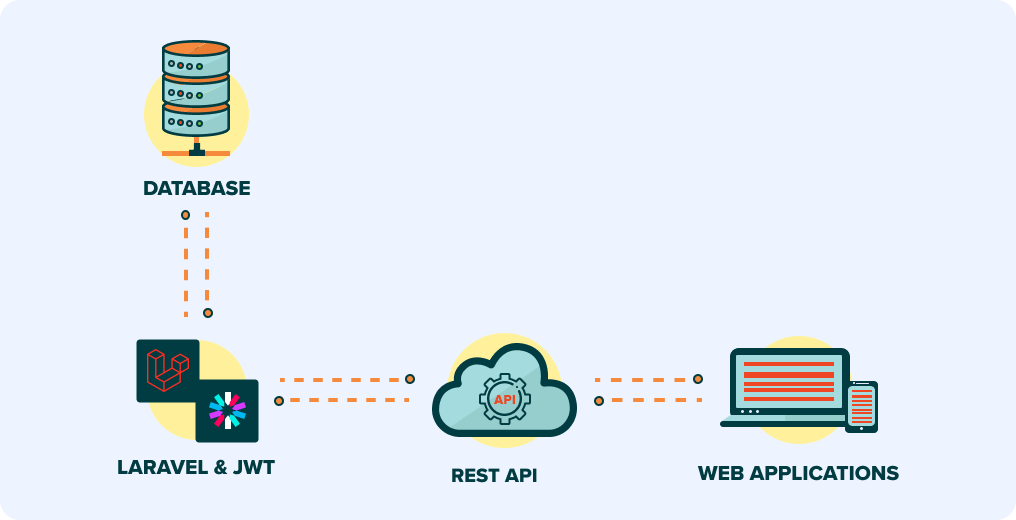
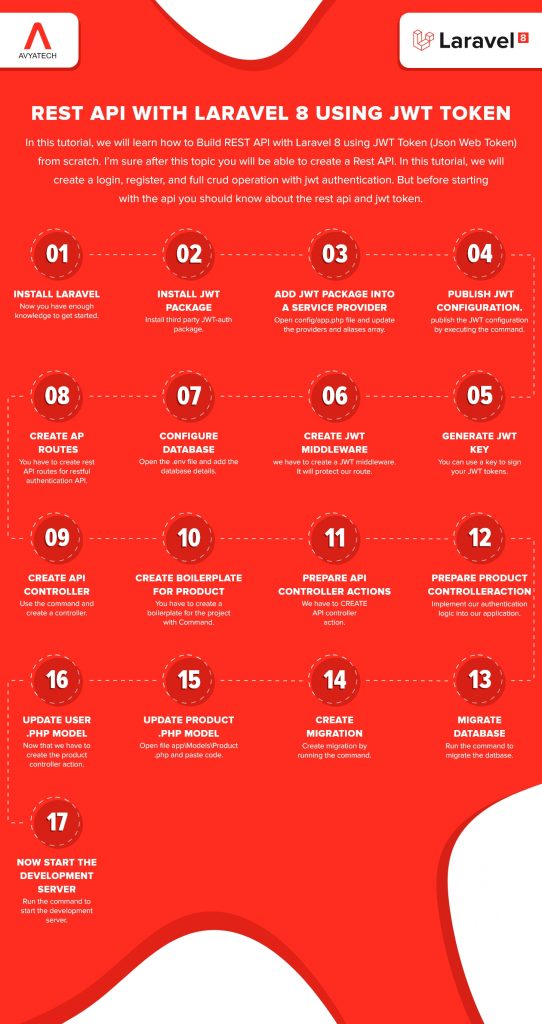
In this tutorial, we will learn how to Build REST API with Laravel 8 using JWT Token (JSON Web Token) from scratch. I’m sure after this topic you will be able to create a Rest API.
In this tutorial, we will create a login, register, and full crud operation with jwt authentication. But before starting with the API you should know about the rest API and jwt token.
What is Rest API?
The REST API (also known as the RESTful API) is an application programming interface (API or web API) that follows the specifications of the REST architecture style and enables interaction with RESTful web services. REST stands for Representative State Transition and was developed by the computer scientist Roy Fielding.
REST is a set of architectural limits, not a protocol or a standard. Developers of APIs can enforce REST in several ways.
When a client request is made through the RESTful API, a description of the resource status is passed to the requester or the endpoint. This information is given in one of several formats through HTTP: HTML, JSON (Javascript Object Notation), XLT, PHP, Python, or plain text. JSON is the most common programming language to use since, unlike its name, it is both agnostic-language and readable by both humans and machines.
Although the term was invented more than 15 years ago, it was not until recently that the REST API became one of the most commonly adopted, to the point of being considered a fashion choice. The reality is that this software architecture has many benefits over other alternatives. Here are the main features of the REST APIs that demonstrate (with examples) why its popularity is far more than a passing trend:
It is stateless
One of the key features of the REST API is that its service is stateless, which means that any time we refer to it, it would be important to remind it of our details, whether it is our user credentials or any other records. What, on the one hand, may seem to be a disadvantage–implying the tiresome role of repeating data–is one of its strengths: because it does not memorize them, it allows for greater scalability. There will be no need for those efficient servers that are capable of holding all the states of their clients.
It supports JSON and XML
There are developers for all preferences, and the API should try to cater to all of them. Another benefit of the REST API is that it satisfies the needs of those who use the JSON language as well as satisfies those who depend on XML.
If giants like Microsoft, Google, or WordPress prefer this type of software architecture in many of their tools, that is, among other reasons, because it stops them from avoiding any developer. They all have a place in the universe of the REST API.
It is simple than SOAP
Beyond the REST architecture, developers use the traditional SOAP, another option when writing an API. The key benefit of the former over the latter is that it is much easier to enforce. A good example can be seen in the API catalog that Salesforce provides: it has resources for both architectures, but states that REST requires access to services that are “efficient, convenient and simpler to communicate with Salesforce.”
Documentation
Each improvement in the architecture of the REST API should be mirrored in its documentation such that any developer who uses it knows what to expect. This is already another benefit over other specifications, which, while they can be mildly clarified – as is the case with the PayPal SOAP API – do not generally have much clarity.
Error messages
When you make a mistake while dealing with an API, any developer may appreciate the error. The possibility provided by the REST architecture of including error messages offering some hint in this regard is therefore also important. Returning to Microsoft, the resources provided by the organization founded by Bill Gates by Azure–its cloud tool–have a simple list of potential error messages that must have been helpful on more than one occasion.
What is a JWT token?
Json Web Token or (JWT) is a URL-safe method or a JSON Payload for securely transferring information from one party to another in the form of Json object. is a method to encode claims in a JSON document and becoming a famous way of handling auth. Brands like qfl-stack, Biting Bit, My Franchise, Mister Spex, Backend, and Tipe are currently using JWT token in their tech stacks.
JWT comes in two forms – Serialized and Deserialized. The Serialized approach is used to transfer the data via the network with every request and response and the deserialized approach is to read and write data to the web token. Now you have the understating of JWT token, let’s move to the structure part of JWT token.
The Structure of JWT
JWT is composed of 5 separate parts encoded in Base64.
- Deserialized
- Header
- Payload
- Serialized
- Signature
Deserialized
JWT only contains the header and payload in the deserialized form. All these objects are basic JSON.
HEADER
The header in the JWT is often used to define the cryptographic operations applied to the JWT, such as the signature/decryption technique used on the JWT. It will also provide details about the media/content type of the information that we are transmitting. This data is interpreted as a JSON object while the JSON object is BASE64URL encoded. The encryption operations in the header signify whether the JWT is unsigned/signed or encrypted. The header usually consists of two parts: JWT and a hashing algorithm, for example, RSA or HMAC SHA256, type of token is used.
{ "alg": "HS256", "typ": "JWT" }PAYLOAD
The second component of the token is the payload containing the arguments. Claims are statements about an entity, guy. The payload is the component of the JWT where all user data is stored. In reality, he added. These data are often referred to as the ‘claims’ of the JWT.
Information is readable by everyone, so it is often recommended not to include such information. Confidential material in this section. Generally, this segment includes user knowledge. This knowledge is present as a JSON object while this JSON object is encoded.
To the BASEL64URL. We can make as many assertions as we want inside a payload,
However, unlike the header, no statements are mandatory for a payload.
- Registered claims: these are a series of predefined claims that are not mandatory but recommended for the purpose of offering a set of useful, interoperable claims.
- Public claims: those using JWTs may be specified at will. But they should be specified in order to prevent collisions.
- Private claims: they are custom claims created to exchange details between people that choose to use them and are neither documented nor public claims.
Serialized
In the serialized type, JWT represents a string of the following format:
[header].[payload].[signature]
In the serialized type, JWT represents a string of the following format:
[header].[payload].[signature]
All three of these elements are a serialized JWT. We all know what the header and payload are and what they’re used to.
SIGNATURE
This is the third component of the JWT that is used to confirm the validity of the token. The encoded header and payloads of BASE64URL are bound to the dot (.) and have been hacked using the algorithm for the Secret Key. This signature is applied to the header and payload with a dot (.) forming our real header.payload.signature.
Why do we use API in Laravel?
APIs use tokens to validate users and do not maintain session state between the requests. API authentication using Laravel is very easy using Laravel JW as it provides a full OAuth2 implementation of the server.
Index
- Install laravel 8
- Install JWT Library
- Login API
- Logout API
- Create Product API
- Update Product API
- List Product API
- Find Product API
- Delete Product API
Server Requirements
- PHP >= 7.2.0
- BCMath PHP Extension
- Ctype PHP Extension
- Fileinfo PHP extension
- JSON PHP Extension
- Mbstring PHP Extension
- OpenSSL PHP Extension
- PDO PHP Extension
- Tokenizer PHP Extension
- XML PHP Extension

Step 1. Install laravel
Now you have enough knowledge to get started. Next we will start creating secure Laravel APIs. let’s create a fresh laravel project by run below command using terminal:
composer create-project laravel/laravel laravel-jwt-auth –prefer-dist
Step 2. Install JWT Package
Install third party jwt-auth package. You can execute the following command to do so:
composer require tymon/jwt-authThis command will install the jwt-auth package in the laravel vendor folder and will update composer.json. It is known as a third-party JWT package that supports user authentication using JSON Web Token in Laravel & Lumen securely.
Step 3. Add jwt package into a service provider
Open config/app.php file and update the providers and aliases array.
'providers' => [
   ...
'Tymon\JWTAuth\Providers\LaravelServiceProvider',
],
'aliases' => [
    ...
    'JWTAuth' => Tymon\JWTAuth\Facades\JWTAuth::class,
     'JWTFactory' => Tymon\JWTAuth\Facades\JWTFactory::class,
],
Now , you have successfully added the JWT package into the service provider. Next, we will publish the package config. File.
Step 4. Publish jwt configuration
Next, publish the JWT configuration by executing the below command.
Publish jwt configuration Command:
php artisan vendor:publish --provider="Tymon\JWTAuth\Providers\LaravelServiceProvider"Then you will see a new file in config/jwt.php
In the next step, you need to run a php artisan jwt:secret from the console to generate a secret auth secret.
Step 5. Generate JWT Key
Command:
php artisan jwt:secret- Jwt key will be created in .env like this
- JWT_SECRET=OSPvaJsWFZ2lXHJl12Hvi6sVUuPo403wjoR6Soaay2OfVCHrscfPmj1Jz8PW87B0
You can use this key to sign your JWT tokens. However, the method of signing tokens will depend and vary on the algorithm that you choose to use.
Step 6. Create jwt middleware
Before we start defining our API routes, we have to create a JWT middleware. It will protect our route. You can use JWT middleware to verify the requests from API routes
Command: php artisan make:middleware JwtMiddleware
By running this command you will see a new file app\Http\Middleware\JwtMiddleware.php
Paste bellow code in the terminal:
<?php

namespace App\Http\Middleware;

use Closure;
use JWTAuth;
use Exception;
use Tymon\JWTAuth\Http\Middleware\BaseMiddleware;

class JwtMiddleware extends BaseMiddleware
{

    /**
     * Handle an incoming request.
     *
     * @param  \Illuminate\Http\Request  $request
     * @param  \Closure  $next
     * @return mixed
     */
    public function handle($request, Closure $next)
    {
        try {
            $user = JWTAuth::parseToken()->authenticate();
        } catch (Exception $e) {
            if ($e instanceof \Tymon\JWTAuth\Exceptions\TokenInvalidException){
                return response()->json(['status' => 'Token is Invalid']);
            }else if ($e instanceof \Tymon\JWTAuth\Exceptions\TokenExpiredException){
                return response()->json(['status' => 'Token is Expired']);
            }else{
                return response()->json(['status' => 'Authorization Token not found']);
            }
        }
        return $next($request);
    }
}
To use this middleware register this into Kernel. Open app\Http\Kernel.php
...
protected $routeMiddleware = [
...
        'jwt.verify' => \App\Http\Middleware\JwtMiddleware::class,
        'jwt.auth' => 'Tymon\JWTAuth\Middleware\GetUserFromToken',
        'jwt.refresh' => 'Tymon\JWTAuth\Middleware\RefreshToken',
    ];
...
This middleware will verify that the user is authenticated by checking the token sent in the request’s header and It will create a new middleware file in your Middleware directory. . In case of user not authenticated middleware throw UnauthorizedHttpException exception.
We have installed and configured the jwt token successfully. Now I’m going to show you how you can use this to parse the data between two applications.
Step 7. Configure database
Go to the root directory of your laravel installation restful authentication api with jwt tutorial project. And open the .env file and add the database details as follow:
...
DB_CONNECTION=mysql
DB_HOST=127.0.0.1
DB_PORT=3306
DB_DATABASE=test_rest_api_db
DB_USERNAME=root
DB_PASSWORD=
...
Step 8. Create API Routes
Next, you have to create rest API routes for restful authentication API with your new jwt project.
To create api route, copy and paste below code in your routes/api.php file
Open this controller and paste the below code as follow
<?php

use Illuminate\Http\Request;
use Illuminate\Support\Facades\Route;
use App\Http\Controllers\ApiController;
use App\Http\Controllers\ProductController;

Route::post('login', [ApiController::class, 'authenticate']);
Route::post('register', [ApiController::class, 'register']);

Route::group(['middleware' => ['jwt.verify']], function() {
    Route::get('logout', [ApiController::class, 'logout']);
    Route::get('get_user', [ApiController::class, 'get_user']);
    Route::get('products', [ProductController::class, 'index']);
    Route::get('products/{id}', [ProductController::class, 'show']);
    Route::post('create', [ProductController::class, 'store']);
    Route::put('update/{product}',  [ProductController::class, 'update']);
    Route::delete('delete/{product}',  [ProductController::class, 'destroy']);
});
Step 9. Create api controller
Create API controller
In this step, you will create a JWTAuthController controller. Use the below command and create a controller :
php artisan make:controller ApiControllerThis command will create the fresh new controller here: app\Http\Controllers\ApiController.php
Step 10. Create boilerplate for product
Next, you have to create a boilerplate for the project. Create boilerplate for product
Command:
php artisan make:model Product -rcm-r = ressource
-c = controller
-m = migrationThis command will create a model, resource, controller and migration in one shot.
Then you will see new files as below:
Controller: app\Http\Controllers\ProductController.php
Model: app\Models\Product.php
Migration: database\migrations\2020_09_17_112923_create_products_table.php
Step 11. Prepare api controller actions
Next, we have to CREATE API controller action. For that, open file app\Http\Controllers\ApiController.php and paste the below code.
<?php

namespace App\Http\Controllers;

use JWTAuth;
use App\Models\User;
use Illuminate\Http\Request;
use Tymon\JWTAuth\Exceptions\JWTException;
use Symfony\Component\HttpFoundation\Response;
use Illuminate\Support\Facades\Validator;

class ApiController extends Controller
{
    public function register(Request $request)
    {
     //Validate data
        $data = $request->only('name', 'email', 'password');
        $validator = Validator::make($data, [
            'name' => 'required|string',
            'email' => 'required|email|unique:users',
            'password' => 'required|string|min:6|max:50'
        ]);

        //Send failed response if request is not valid
        if ($validator->fails()) {
            return response()->json(['error' => $validator->messages()], 200);
        }

        //Request is valid, create new user
        $user = User::create([
         'name' => $request->name,
         'email' => $request->email,
         'password' => bcrypt($request->password)
        ]);

        //User created, return success response
        return response()->json([
            'success' => true,
            'message' => 'User created successfully',
            'data' => $user
        ], Response::HTTP_OK);
    }

    public function authenticate(Request $request)
    {
        $credentials = $request->only('email', 'password');

        //valid credential
        $validator = Validator::make($credentials, [
            'email' => 'required|email',
            'password' => 'required|string|min:6|max:50'
        ]);

        //Send failed response if request is not valid
        if ($validator->fails()) {
            return response()->json(['error' => $validator->messages()], 200);
        }

        //Request is validated
        //Crean token
        try {
            if (! $token = JWTAuth::attempt($credentials)) {
                return response()->json([
                 'success' => false,
                 'message' => 'Login credentials are invalid.',
                ], 400);
            }
        } catch (JWTException $e) {
     return $credentials;
            return response()->json([
                 'success' => false,
                 'message' => 'Could not create token.',
                ], 500);
        }

   //Token created, return with success response and jwt token
        return response()->json([
            'success' => true,
            'token' => $token,
        ]);
    }

    public function logout(Request $request)
    {
        //valid credential
        $validator = Validator::make($request->only('token'), [
            'token' => 'required'
        ]);

        //Send failed response if request is not valid
        if ($validator->fails()) {
            return response()->json(['error' => $validator->messages()], 200);
        }

  //Request is validated, do logout
        try {
            JWTAuth::invalidate($request->token);

            return response()->json([
                'success' => true,
                'message' => 'User has been logged out'
            ]);
        } catch (JWTException $exception) {
            return response()->json([
                'success' => false,
                'message' => 'Sorry, user cannot be logged out'
            ], Response::HTTP_INTERNAL_SERVER_ERROR);
        }
    }

    public function get_user(Request $request)
    {
        $this->validate($request, [
            'token' => 'required'
        ]);

        $user = JWTAuth::authenticate($request->token);

        return response()->json(['user' => $user]);
    }
}
Step 12. Prepare product controller action
Now, in this step, you will have to implement our authentication logic into our application. To create a product controller action, open file app\Http\Controllers\ProductController.php and paste below code:
<?php
namespace App\Http\Controllers;

use App\Models\Product;
use Illuminate\Http\Request;
use JWTAuth;
use Tymon\JWTAuth\Exceptions\JWTException;
use Symfony\Component\HttpFoundation\Response;
use Illuminate\Support\Facades\Validator;

class ProductController extends Controller
{
    protected $user;

    public function __construct()
    {
        $this->user = JWTAuth::parseToken()->authenticate();
    }

    /**
     * Display a listing of the resource.
     *
     * @return \Illuminate\Http\Response
     */
    public function index()
    {
        return $this->user
            ->products()
            ->get();
    }

    /**
     * Show the form for creating a new resource.
     *
     * @return \Illuminate\Http\Response
     */
    public function create()
    {
        //
    }

    /**
     * Store a newly created resource in storage.
     *
     * @param  \Illuminate\Http\Request  $request
     * @return \Illuminate\Http\Response
     */
    public function store(Request $request)
    {
        //Validate data
        $data = $request->only('name', 'sku', 'price', 'quantity');
        $validator = Validator::make($data, [
            'name' => 'required|string',
            'sku' => 'required',
            'price' => 'required',
            'quantity' => 'required'
        ]);

        //Send failed response if request is not valid
        if ($validator->fails()) {
            return response()->json(['error' => $validator->messages()], 200);
        }

        //Request is valid, create new product
        $product = $this->user->products()->create([
            'name' => $request->name,
            'sku' => $request->sku,
            'price' => $request->price,
            'quantity' => $request->quantity
        ]);

        //Product created, return success response
        return response()->json([
            'success' => true,
            'message' => 'Product created successfully',
            'data' => $product
        ], Response::HTTP_OK);
    }

    /**
     * Display the specified resource.
     *
     * @param  \App\Models\Product  $product
     * @return \Illuminate\Http\Response
     */
    public function show($id)
    {
        $product = $this->user->products()->find($id);

        if (!$product) {
            return response()->json([
                'success' => false,
                'message' => 'Sorry, product not found.'
            ], 400);
        }

        return $product;
    }

    /**
     * Show the form for editing the specified resource.
     *
     * @param  \App\Models\Product  $product
     * @return \Illuminate\Http\Response
     */
    public function edit(Product $product)
    {
        //
    }

    /**
     * Update the specified resource in storage.
     *
     * @param  \Illuminate\Http\Request  $request
     * @param  \App\Models\Product  $product
     * @return \Illuminate\Http\Response
     */
    public function update(Request $request, Product $product)
    {
        //Validate data
        $data = $request->only('name', 'sku', 'price', 'quantity');
        $validator = Validator::make($data, [
            'name' => 'required|string',
            'sku' => 'required',
            'price' => 'required',
            'quantity' => 'required'
        ]);

        //Send failed response if request is not valid
        if ($validator->fails()) {
            return response()->json(['error' => $validator->messages()], 200);
        }

        //Request is valid, update product
        $product = $product->update([
            'name' => $request->name,
            'sku' => $request->sku,
            'price' => $request->price,
            'quantity' => $request->quantity
        ]);

        //Product updated, return success response
        return response()->json([
            'success' => true,
            'message' => 'Product updated successfully',
            'data' => $product
        ], Response::HTTP_OK);
    }

    /**
     * Remove the specified resource from storage.
     *
     * @param  \App\Models\Product  $product
     * @return \Illuminate\Http\Response
     */
    public function destroy(Product $product)
    {
        $product->delete();

        return response()->json([
            'success' => true,
            'message' => 'Product deleted successfully'
        ], Response::HTTP_OK);
    }
}
Step 13. Update User.php model
Now that we have created the product controller action, let’s define this in our project model. This step will help you make managing and working with relationships easy, and supports a number of relationship types.Open file app\Models\User.php and paste below code:
<?php
namespace App\Models;

use Illuminate\Contracts\Auth\MustVerifyEmail;
use Illuminate\Database\Eloquent\Factories\HasFactory;
use Illuminate\Foundation\Auth\User as Authenticatable;
use Illuminate\Notifications\Notifiable;
use Tymon\JWTAuth\Contracts\JWTSubject;

class User extends Authenticatable implements JWTSubject
{
    use HasFactory, Notifiable;

    /**
     * The attributes that are mass assignable.
     *
     * @var array
     */
    protected $fillable = [
        'name', 'email', 'password',
    ];

    /**
     * The attributes that should be hidden for arrays.
     *
     * @var array
     */
    protected $hidden = [
        'password', 'remember_token',
    ];

    /**
     * The attributes that should be cast to native types.
     *
     * @var array
     */
    protected $casts = [
        'email_verified_at' => 'datetime',
    ];

    public function getJWTIdentifier()
    {
        return $this->getKey();
    }
    public function getJWTCustomClaims()
    {
        return [];
    }
    public function products()
    {
        return $this->hasMany(Product::class);
    }
}
Step 14. Update Product.php model
Open file app\Models\Product.php and paste below code
<?php

namespace App\Models;

use Illuminate\Database\Eloquent\Factories\HasFactory;
use Illuminate\Database\Eloquent\Model;

class Product extends Model
{
    use HasFactory;
    protected $fillable = [
        'name', 'sku', 'price', 'quantity'
    ];
}
Step 15. Create migration
Although Laravel comes with an in-built user model, migration, and factory files, it does not consist of a user seeder class. So in this step, we will create migration by running the command:
Open file database\migrations\2020_09_17_112923_create_products_table.php and paste below code
<?php

use Illuminate\Database\Migrations\Migration;
use Illuminate\Database\Schema\Blueprint;
use Illuminate\Support\Facades\Schema;

class CreateProductsTable extends Migration
{
    /**
     * Run the migrations.
     *
     * @return void
     */
    public function up()
    {
        Schema::create('products', function (Blueprint $table) {
            $table->id();
            $table->unsignedInteger('user_id');
            $table->string('name');
            $table->string('sku');
            $table->integer('price');
            $table->integer('quantity');
            $table->timestamps();

            $table->foreign('user_id')
                    ->references('id')
                    ->on('users')
                    ->onDelete('cascade');
        });
    }

    /**
     * Reverse the migrations.
     *
     * @return void
     */
    public function down()
    {
        Schema::dropIfExists('products');
    }
}
Step 16: Migrate database
Command:
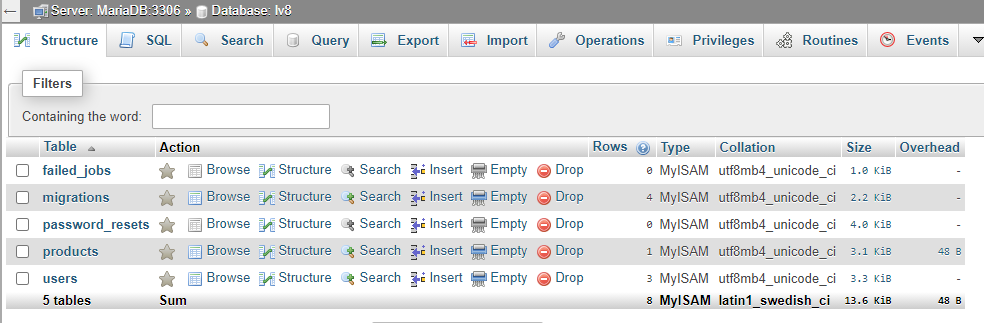
php artisan migrateBy running this command table will be created in the desired database which is configured in the .env
And your table looks like this.
Step 17. Now start the development server
Command:
php artisan migrateTest API
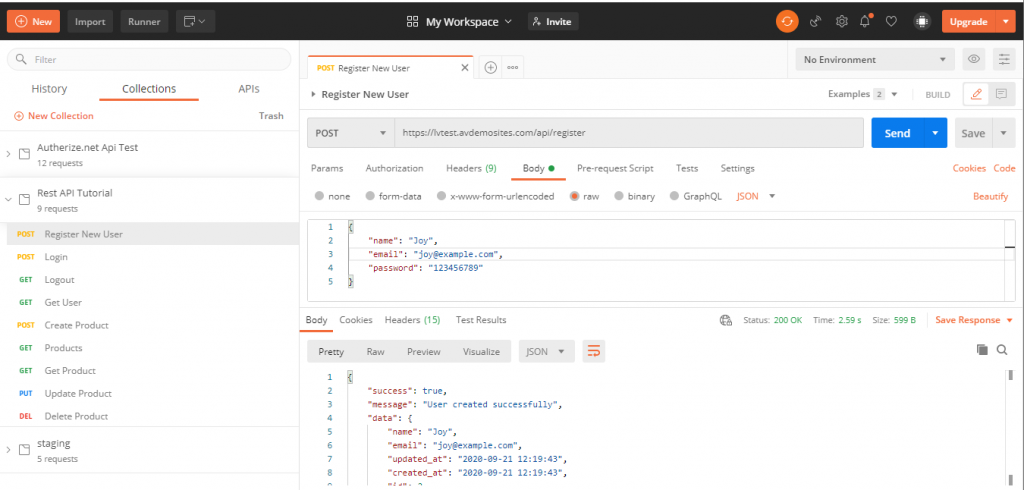
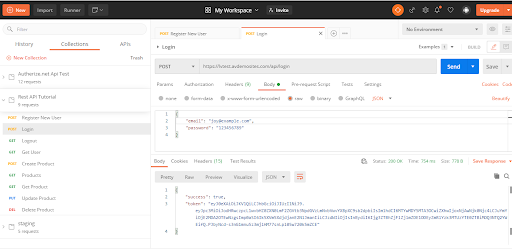
Note: In this tutorial, we have created a restful API in Laravel 8 using the jwt token. Now I’m going to show you how to test this API in postman.
Endpoint url:
Register User:https://lvtest.avdemosites.com/api/register
Login User:https://lvtest.avdemosites.com/api/login
Logout User:https://lvtest.avdemosites.com/api/logout
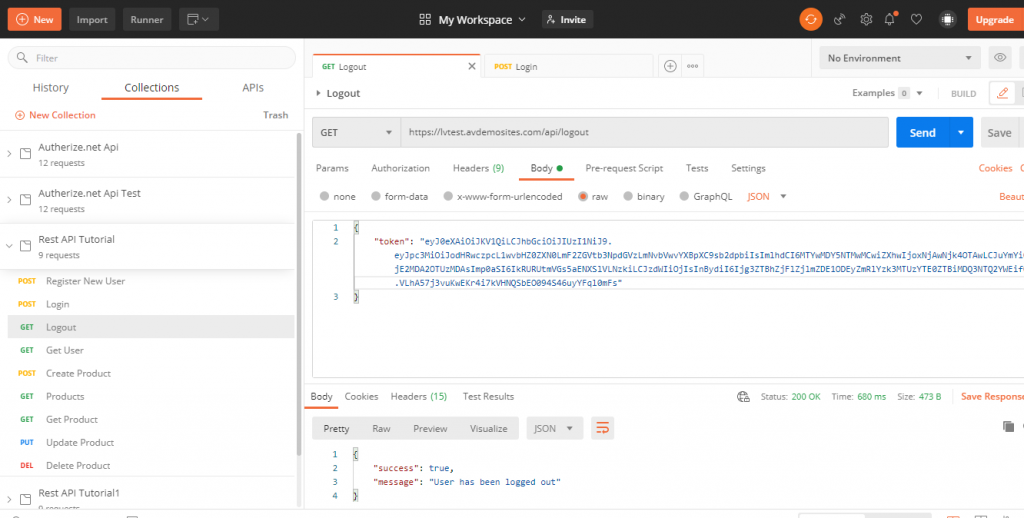
Get User:https://lvtest.avdemosites.com/api/get_user

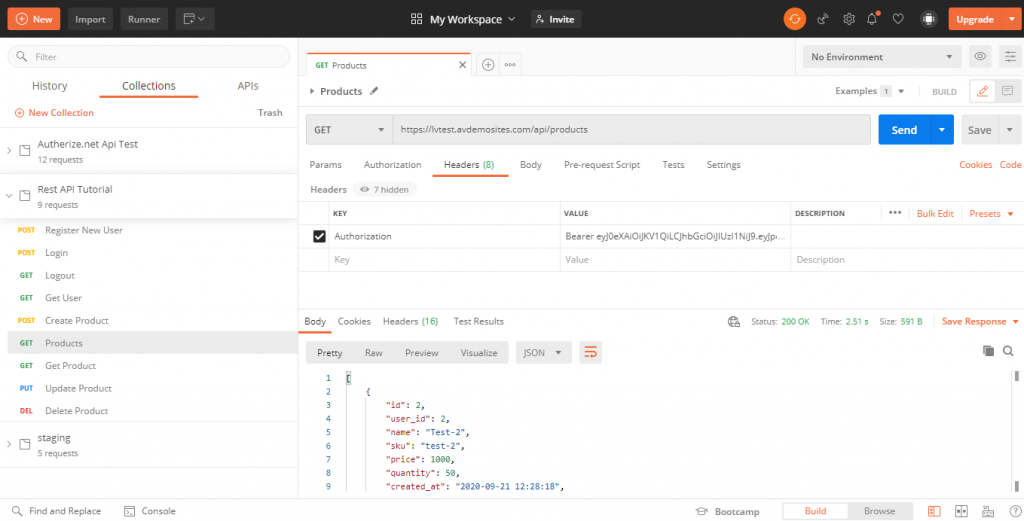
Get All products:https://lvtest.avdemosites.com/api/products
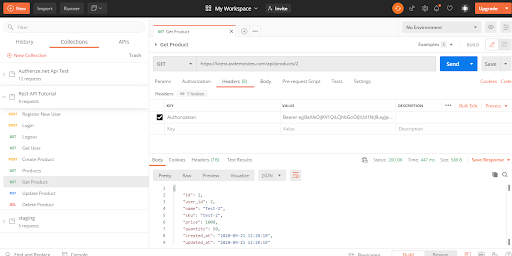
Get product by product_id:https://lvtest.avdemosites.com/api/products/1
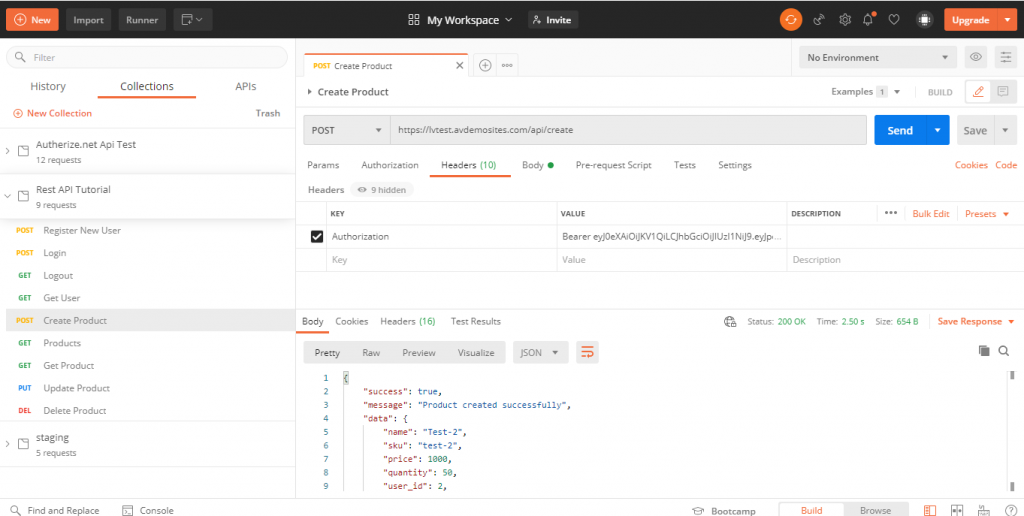
Create product:https://lvtest.avdemosites.com/api/create
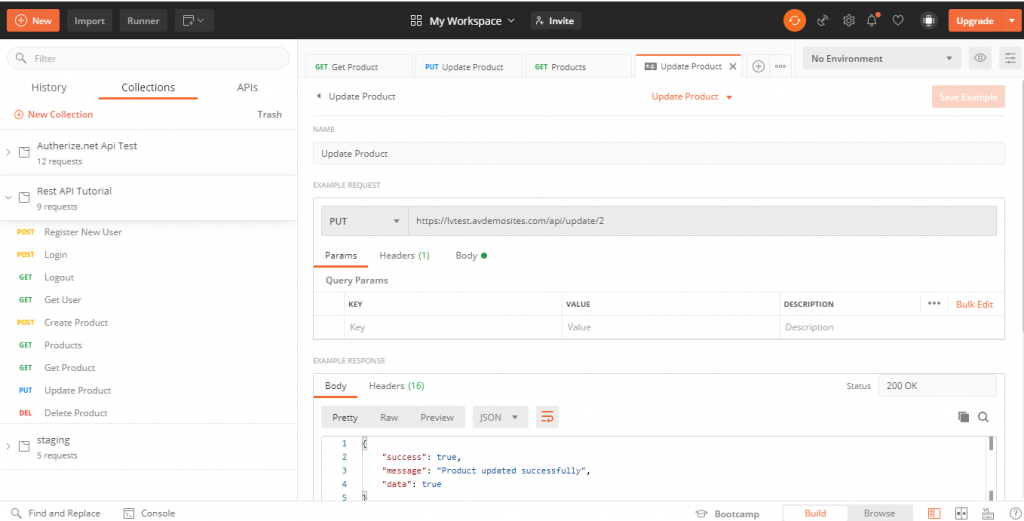
Update product:https://lvtest.avdemosites.com/api/update/2
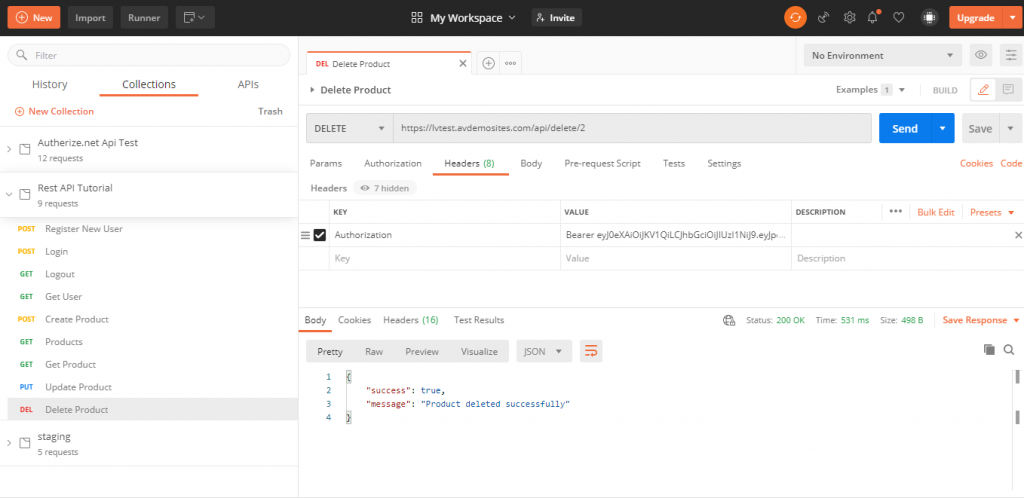
Delete Product:https://lvtest.avdemosites.com/api/delete/2
You can find this tutorial postman documentation here: https://documenter.getpostman.com/view/4433773/TVKD1crk
Hope this tutorial is helpful for you to learn to Build REST API with Laravel 8 using JWT Token (JSON Web Token) from scratch.